Adding a Watermark
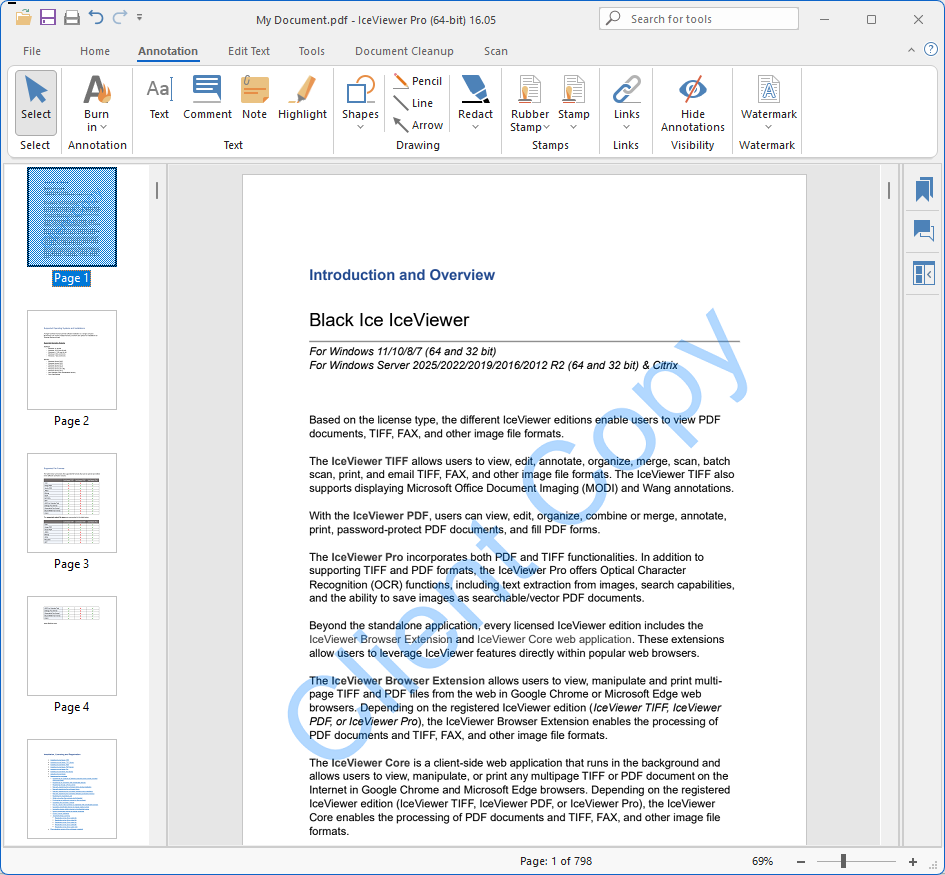
The Watermark feature in the IceViewer allows users to overlay custom text or files onto PDF and TIFF documents. Watermarks can be used for labeling, branding, or indicating the status of a document.
How to add Watermarks
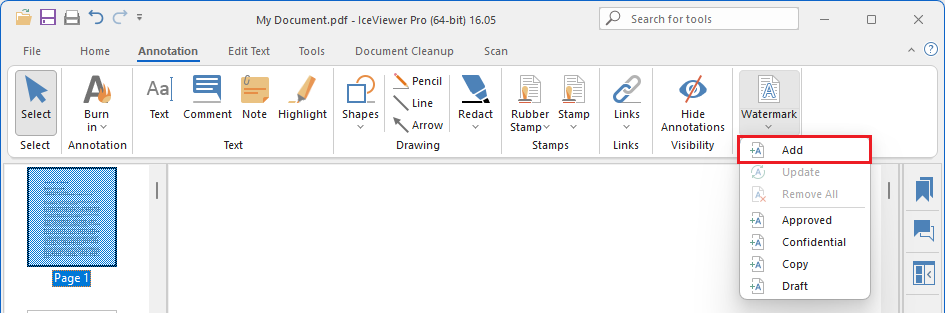
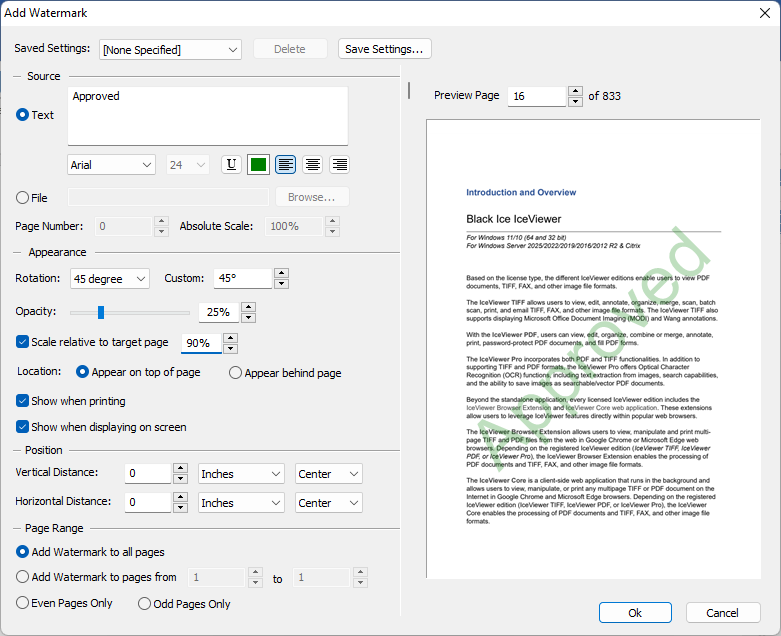
To add a watermark, please navigate to the Annotation tab in the IceViewer and select the Watermark dropdown menu > Add Watermark option.
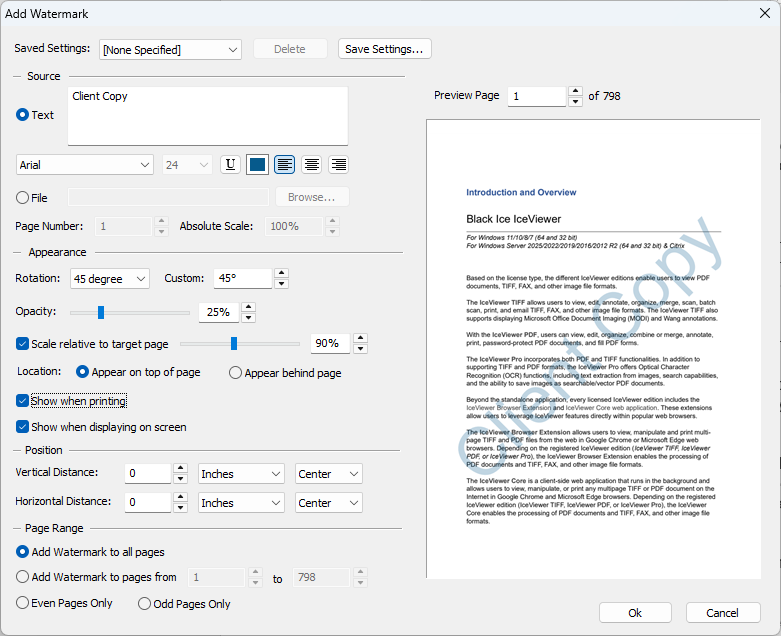
In the Add Watermark window, users can configure the source (text or file), appearance, and position of the watermark, as well as specify which pages the watermark should be applied to.
Source configuration
Under the Source section, the user can choose to insert either a text or a file-based watermark.
Text-based Watermark
To insert a text-based watermark, select the Text option and enter the desired text in the input field. Users can customize the font, size, style, color, and alignment of the text using the formatting tools provided below the input field. The watermark text can be formatted using any Windows font installed on the computer.
.png)
File-based Watermark
To insert a file-based watermark, select the File option and click the Browse… button to choose a file. The selected file can be an image (jpg., .png, .bmp) or a multi-page document, such as a PDF or TIFF.
.png)
Page Number - When using a multi-page document, the Page Number option allows users to specify which page of the source file should be used as the watermark.
Absolute Scale - Sets the scaling percentage of the watermark relative to its original size. This allows fine control over how large the inserted image or page appears when applied to the target document.
Appearance configuration
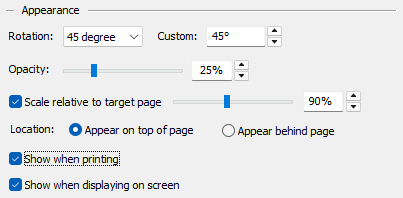
Options in the Appearance section allows users to customize the watermark, including rotation, transparency, scaling, layering, and visibility.
Rotation
Allows users to rotate the watermark. The Rotation dropdown menu provides common preset angles (-45°, 0, 45°), while the Custom field allows users to select any angle in degrees for more precise control. By default, 45° is set.
Opacity
Users can adjust the transparency of the watermark using a slider or by entering a percentage value. A lower opacity makes the watermark more transparent, blending it with the background, while a higher opacity makes it more prominent. By default, 50° is set.
Scale relative to target page
When enabled, the watermark is scaled proportionally based on the dimensions of the target page. Users can adjust the scaling using a slider or by entering a specific percentage value to control the size of the watermark in relation to the page. This ensures consistent visual appearance across documents with varying page sizes. By default, 50% is set.
Location
Determines whether the watermark appears in front of or behind the page content:
- Appear on top of page: Applies the watermark above the existing content. (Default)
- Appear behind page: Applies the watermark beneath the existing content.
Show when printing
When enabled, the watermark will be included in printed document.
Show when displaying on screen
When enabled, the watermark is visible while viewing the document on-screen within the IceViewer.
Position configuration
The Position section allows users to control the exact placement of the watermark on the page by adjusting vertical and horizontal distances and selecting alignment options.
.png)
Vertical Distance
Sets the vertical offset of the watermark from the top edge of the page. Users can specify a number and select the unit of measurement. The following units are available: inches, percent, centimeters, millimeters, picas, and points.
Vertical Alignment
Determines the vertical anchor point for the watermark placement. Available options include: Top, Center, Bottom.
Horizontal Distance
Sets the horizontal offset of the watermark from the left edge of the page. Users can specify a number and select the unit of measurement. The following units are available: inches, percent, centimeters, millimeters, picas, and points.
Horizontal Alignment
Determines the horizontal anchor point for the watermark placement. Available options include: Left, Center, Right.
Page Range Configuration
The Page Range section allows users to specify which pages of the document should include the watermark.
.png)
Add Watermark to all pages
Applies the watermark to every page in the document.
Add Watermark to pages from [ ] to [ ]
Allows users to define a custom page range by specifying the starting and ending page numbers. The watermark will only be added to the pages within this range.
Even Pages Only
Apply the watermark only to even-numbered pages within the selected range or the entire document.
Odd Pages Only
Apply the watermark only to odd-numbered pages within the selected range or the entire document.
Save Settings
The Save Settings option allows users to store the current watermark configuration for future use. To save a configured watermark, click the Save Settings… button.
.png)
In the Save Settings window, enter a name for the preset and click OK.
.png)
To apply a previously saved configuration, please navigate to the Annotations tab and select the desired preset from the Watermark dropdown menu.
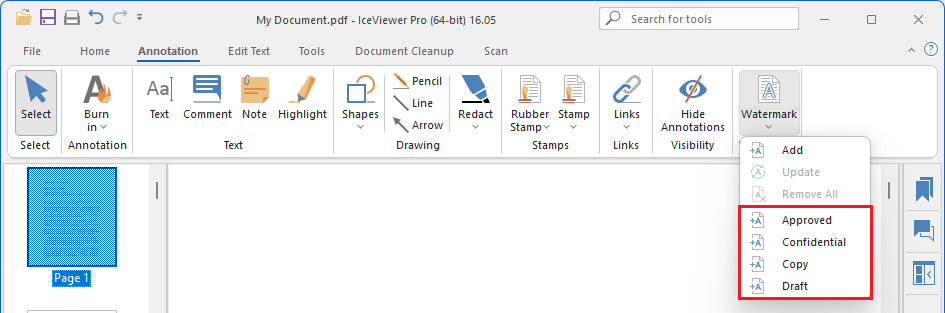
To delete a saved configuration, click the Watermark button on the Annotations tab, select the preset from the Saved Settings dropdown in the Add Watermark window, and then click the Delete button.
.png)
Update Watermark
To update the watermark, please navigate to the Annotation tab and click the Watermark dropdown menu > Update option.
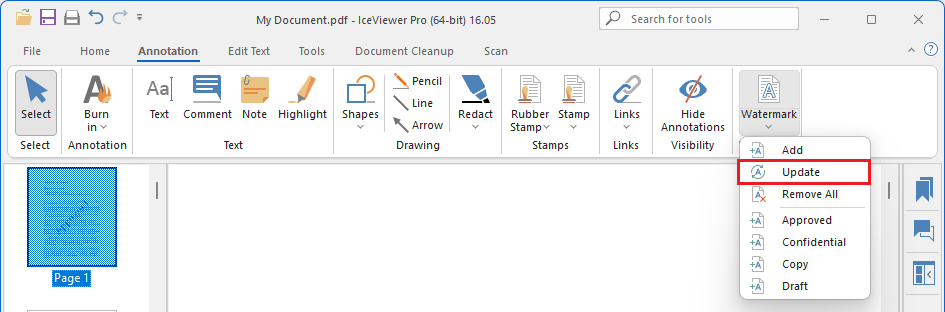
Modify the watermark settings in the Add Watermark window as needed, then click OK to apply the changes.
Remove All Watermarks
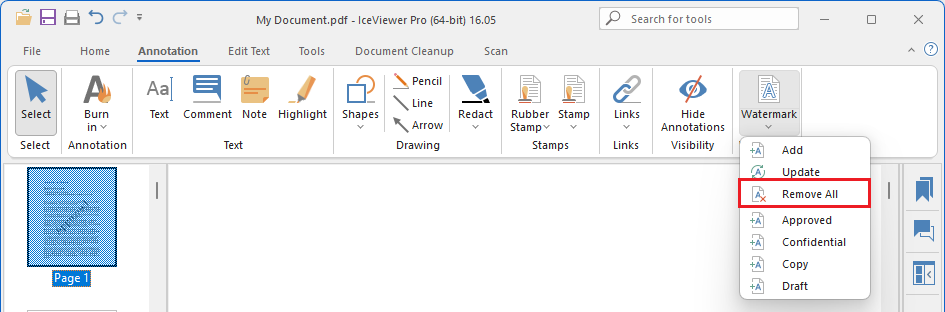
To remove all watermarks from the document, please navigate to the Annotation tab and select the Watermark dropdown menu > Remove All option.