
Batch Scanning
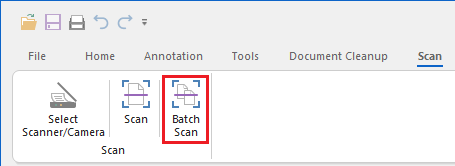
Black Ice IceViewer can acquire images in batch from any TWAIN or WIA-compatible scanner that is equipped with a document feeder. Images can easily be acquired from a TWAIN or WIA data source using the following steps:
-
Make sure the scanner or camera and software is
installed and configured correctly.
Make sure the scanner and software are installed and working properly. Black Ice Software cannot help with configuring scanner hardware or software. Contact the manufacturer of the scanner hardware and software for technical assistance.
-
Selecting a source (scanner, camera, etc.).
Select the TWAIN or WIA source that will be used for the scanning. Open the Black Ice IceViewer and select the Scan tab and then Select Scanner/Camera. The following dialog box appears:
.png)
The dialog box displays a list of scanners, cameras, and other compatible devices that can be used with the IceViewer software. The type of each device (TWAIN or WIA) is shown in parentheses after the device name. Select the desired device and press Select.
NOTE: Every time the Black Ice IceViewer is shut down and restarted this step must be repeated in order to scan a document.
- Starting the batch scan process.
Insert documents into the document feeder of the scanner. In the IceViewer, select the Scan tab > Batch Scan option. The Batch Scan Options dialog appears:
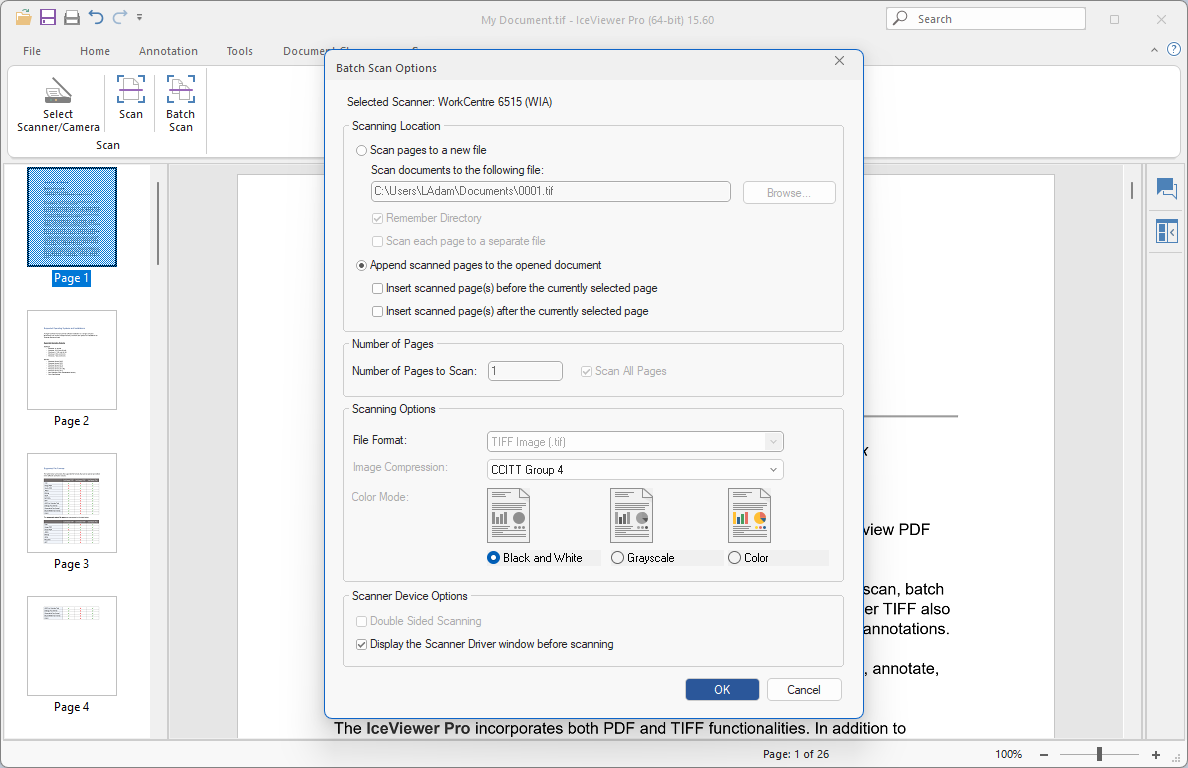
Scanning Location
Scan pages to a new file – Pages will be scanned to a new file. One can specify the path and filename of the output file.
If the Remember directory option is enabled, the IceViewer will remember and use the previously used scan directory.
Scan each page to a separate file - If enabled, each scanned page will be saved as a separate image.
Append scanned pages to the opened document – scanned pages will be appended to the currently opened document in the IceViewer.
Insert scanned page(s) before the currently selected page – scanned pages will be added to the document before the current page. If multiple pages are selected, the scanned pages will be added before the first page of the selection.
Insert scanned page(s) after the currently selected page – scanned pages will be added to the document after the current page. If multiple pages are selected, the scanned pages will be added after the last page of the selection.
Number of Pages
One can specify the number of pages to scan by entering a number into the Number of Pages to Scan box. In order to scan all pages, check the Scan All Pages checkbox.
Scanning Options
Paper Size – Allows the selection of the paper dimensions used during scanning with WIA-compatible scanners. This option ensures that the scanned image matches the intended page size, rather than using the scanner's default paper size.
File Format - One can specify the file format of the output image. The following file formats are available:
- TIFF Image (.tif)
- JPEG Image (.jpg)
- Bitmap Image (.bmp)
- PNG Image (.png)
- PDF Document (.pdf)
- Dialogic Fax Format (.tif)
- GammaLink Fax Forma (.tif)
- Bicom/NMS Fax Format (.tif)
Image Compression - One can specify the compression type of the TIFF image. No Compression results in a large file size, CCITT G4 compression will create a small TIFF file.
Color Mode - One can specify the color depth of the image. Color can be set to Black and White, Grayscale or Color.
Scanner Device Options
Double Sided Scanning – If this checkbox is checked, the duplex (double sided) scanning is enabled.
Display the Scanner Driver window before scanning – If this checkbox is checked the Scanner Driver window shows up before every scanning process, where users can specify device dependent settings.