Email Scheduling
Print2Email supports scheduling emails for delivery at a later time. This allows users to align email sending with their preferred working hours or business schedules.
How It Works
When an email is scheduled, Print2Email stores it locally on the user’s computer until the specified time. A background task then sends the email silently using Print2Email.
Important:
- The scheduled emails are only sent if the computer is powered on and the user is not signed out at the scheduled time.
- If the computer is off or a disruption occurs (e.g., shutdown, power outage), the email will be sent automatically as soon as the system is back online.
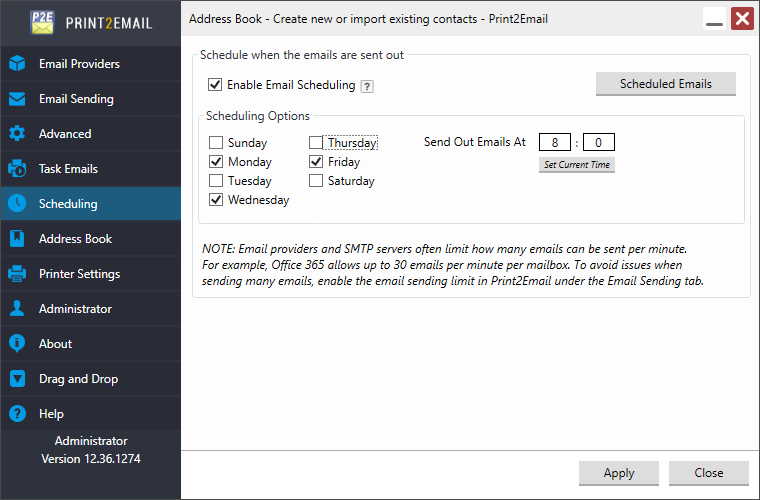
Enabling Email Scheduling
To enable the scheduling feature:
- Open Print2Email.
- Navigate to the Scheduling tab.
- Enable the “Enable Email Scheduling” option
- Configure:
- The days of the week emails are allowed to be sent.
- The specific time when scheduled emails should be dispatched.
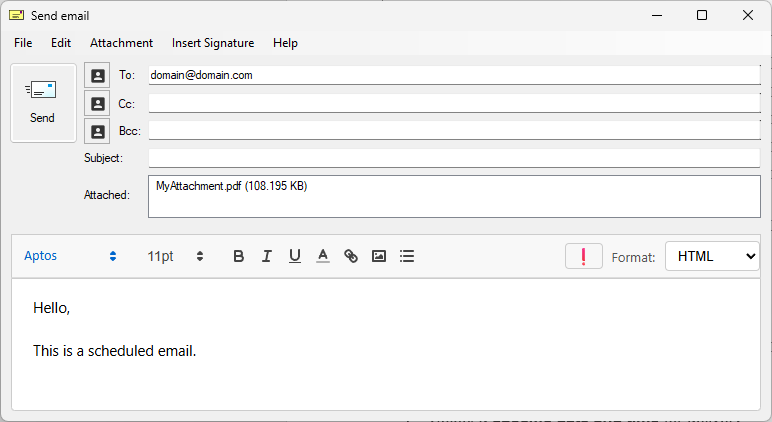
Scheduling an Email
Once scheduling is enabled, when composing an email using Print2Email, a new Schedule Send button will appear in the email dialog.
To schedule an email:
- Click Schedule Send.
-
Select a specific date and time for delivery.
This setting applies only to the current email.
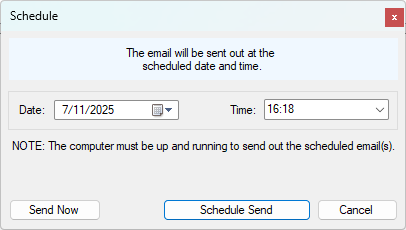
If you prefer to send the email immediately, simply click the Send Now button instead.
If the email is sent silently, it will automatically be scheduled for the preferred time of delivery on the next enabled weekday that is configured in Print2Email.
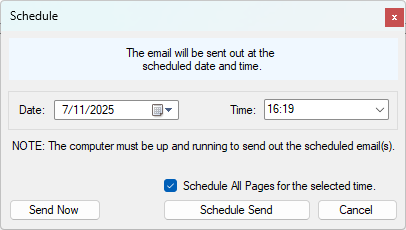
Using Email Scheduling with the Send Each Page As Separate Email Option
When both the Email Scheduling and Send each page as separate email options are enabled, Print2Email allows scheduling every email (one per page) to be sent at the same time, rather than prompting to schedule each one individually.
If the Schedule All Pages for the selected time checkbox is enabled, Print2Email schedules every generated email for the specified time selected in the scheduling dialog.
Compatibility Note
The scheduling feature is only supported for:
- Custom SMTP servers
- Predefined providers in Print2Email such as:
- Gmail
- Outlook.com
- Yahoo, etc.
Note: Scheduling is not supported for Outlook/MAPI clients unless silent email sending is enabled.
Note: When a scheduled email sending fails due to any reason, such as the Mailbox is currently unavailable, there will be no error message displayed to the user. For this reason, it is recommended to enable the Debug Logging in Print2Email when the Scheduling feature is actively used, to make it easier to track email sending issues.
Review the list of scheduled emails
To review the already scheduled emails, please navigate to Print2Email > Scheduling and press the Scheduled Emails button.
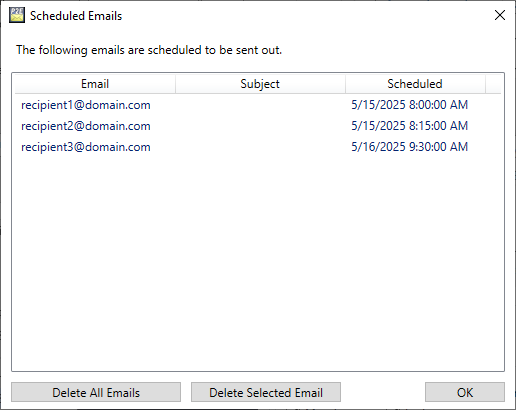
On the Scheduled Emails window, you can review the list of scheduled email recipients, subject, and the scheduled time.
You can also delete scheduled emails individually or delete all scheduled emails by using the buttons at the bottom of the window.