Installing the Print2Email
NOTE: The user must have an active Internet connection to install and register the Print2Email.
In order to install Print2Email, the installing user must have administrative privileges for the computer.
- To start the installation, go to the directory where the Print2Email program file is downloaded to and double click on Print2EmailSetup.exe. The following screen will appear:

- Click Next to proceed.
- The next screen contains the Black Ice License Agreement. After reading this license agreement, select the “I accept the terms of the license agreement” to continue.

- Install Print2Email for all users or only to the current user:
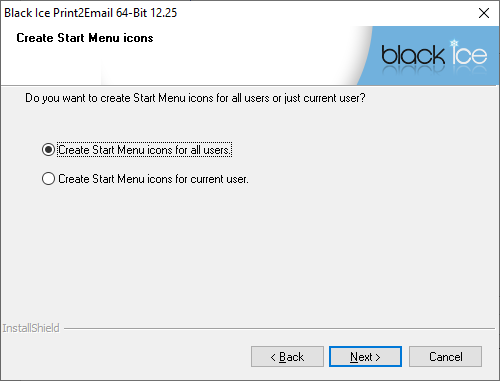
-
Press Next to continue.
- Specify the Print2Email installation directory by using the Browse button, or proceed with the default installation path.
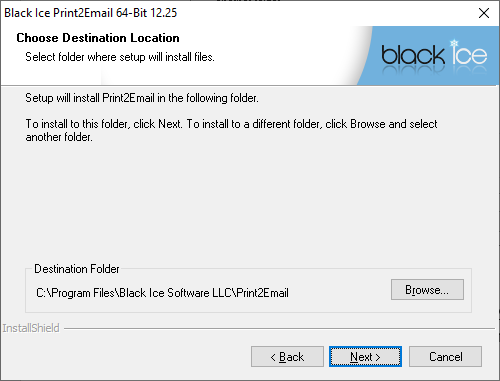
- Press Next to continue.
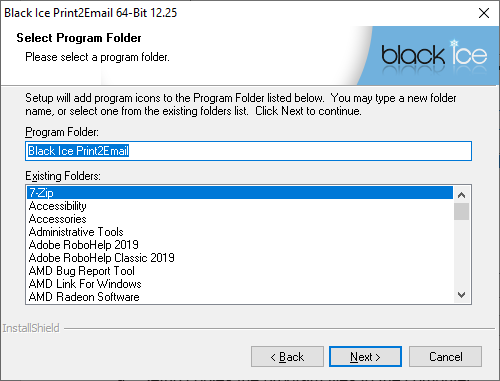
- Specify the name of the Program Folder that Print2Email will be listed under. Enter a new folder name if necessary. Press Next to continue.
- Setup copies the program files to the computer.

- Choose the output directory of the Print2Email. The printed documents will be placed into this directory. Users must have write permission to the output folder. Environment variables can be used in the output path.
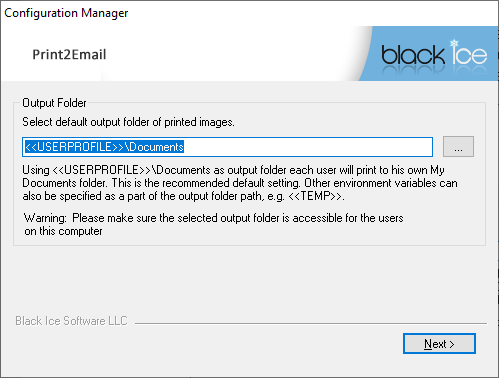
- Press Next to continue.
If the registration of the evaluation version of Print2Email is not successfully finished, read the Manually registering the Print2Email Demo during installation section.
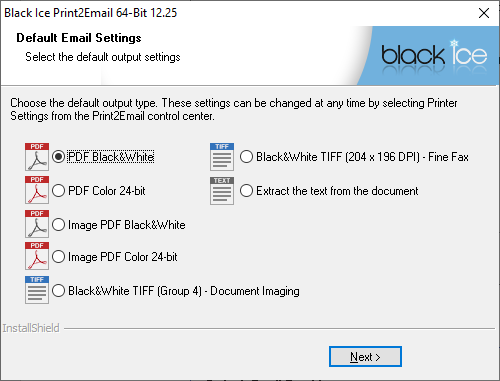
- Choose the file type for the image attachments and press Next to continue.
NOTE: The selected file format will be the default for all users. The user can change the file type at any time in the Print2Email Printer Settings.
-
Press Next to continue.
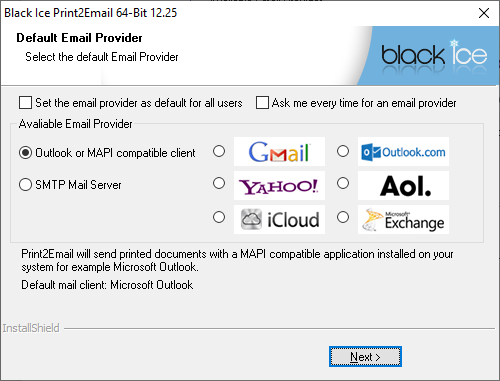
- Configure the default Print2Email email provider. You can configure these options later in the Print2Email Control Center.
- If the “Set the email provider as default for all users” option is selected, then the setting will be applied to every user on the computer, otherwise only to the Administrator who performing the installation.
- If selecting the “Ask me every time for an email provider” checkbox, the Print2Email will prompt on each print for the E-mail provider.
-
Available Email Providers:
-
MAPI compatible: Print2Email sends printed documents with a MAPI compatible email application, for example, Outlook Client.
.png)
-
Preset email providers: Print2Email sends the printed documents through one of the selected preset email providers, for example Outlook.com or Gmail. If a preset email provider was set, such as Outlook.com or Google, the Administrator can setup the email account settings when clicking on the Next button.
To configure the email account settings now, click on the Use the following email account settings radio button, and enter the Account Name and Password.
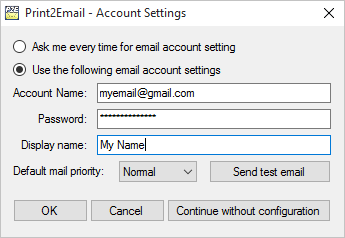
If you don’t want to enter email account settings, click on the Continue without configuration button.
The account settings can be configured after the installation in the Print2Email Email Setting.
-
SMTP Mail Server: Print2Email sends printed documents through a custom SMTP server.
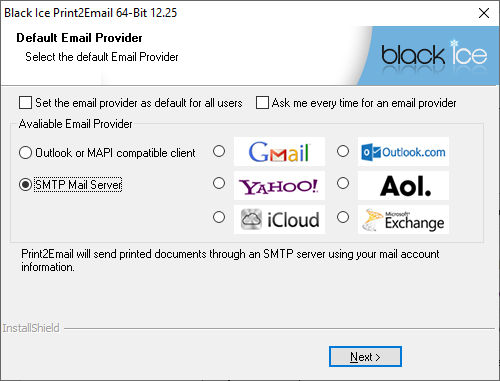
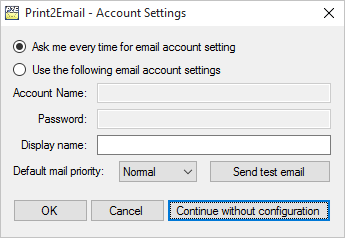
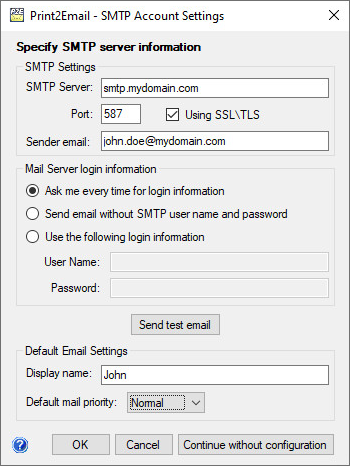
If one would like to setup a custom SMTP server for sending emails, select the SMTP Mail Server, and configure the server preferences on the appearing window. For more information regarding the SMTP server settings, refer to the SMTP settings section in the manual.
If you don’t want to enter SMTP settings, click on the Continue without configuration button.
-
MAPI compatible: Print2Email sends printed documents with a MAPI compatible email application, for example, Outlook Client.
- Click on the OK/Next button to proceed, and on the next window, check any of the following options:
- Place a Print2Email shortcut icon on desktop.
- Start Print2Email when I start Windows.
- View Print2Email documentation.
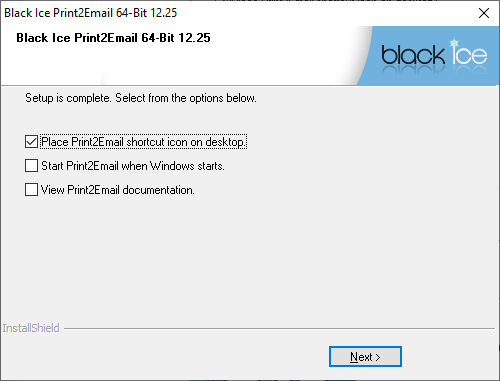
- Click Next to continue.
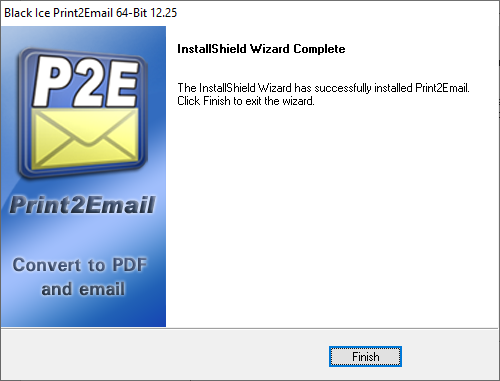
- Click Finish to complete the installation. If the installer asks for restarting, restart the computer before using Print2Email.
For installation error codes, please see the Installation error codes section of the manual