
Configuring the Website and Application Pool manually
During the installation, the IceViewer HTML5 automatically configures the IceViewer HTML5 website and Application Pool. Although, if you would like to configure the website manually along with the Application Pool, the following guide includes the step-by-step instructions for the configuration.
First of all, please make sure that all the required roles and features are installed on the computer.
Go to Internet Information Services (IIS) Manager > Server Name > Sites > Add Website…
Enter a Site name, and browse the location where the IceViewer HTML5 web application files are located. Usually it’s in c:\inetpub\wwwroot\iceviewer
Enter the port number to access the website. One can also configure a host/domain name for the website, or assign specific IP address.
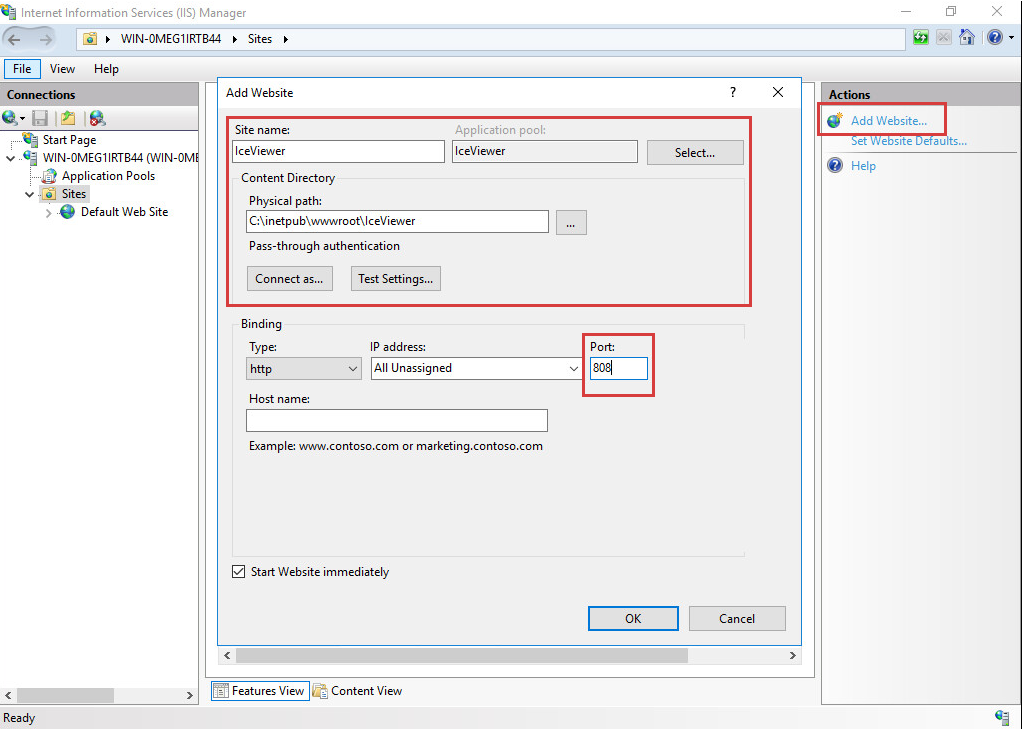
Press the OK button when finished.
Highlight the newly created IceViewer HTML5 website on the left pane, and go to Authentication.
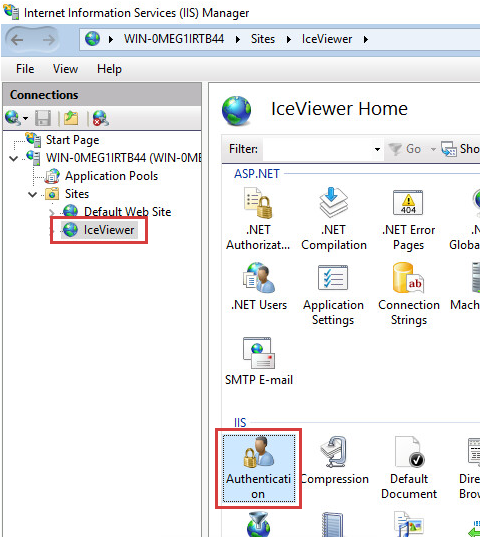
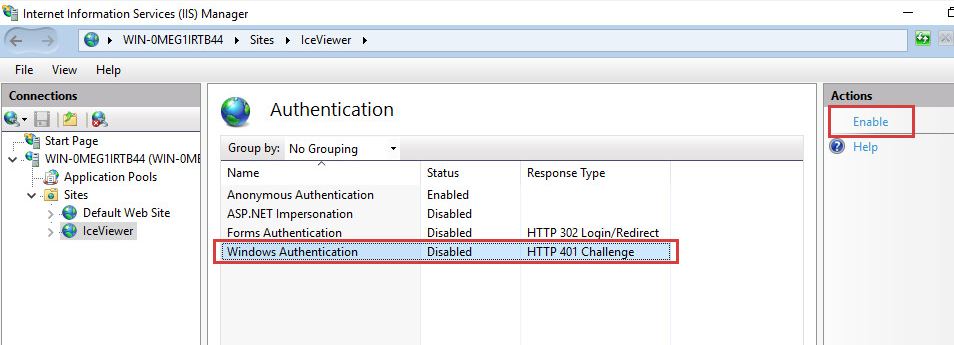
If Windows Authentication is not enabled, then highlight the Windows Authentication option, and click on the Enable option on the right pane.
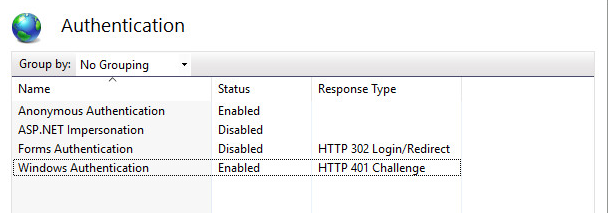
Both Anonymous and Windows Authentication must be enabled.
Once done, go to Application Pools on the left pane, highlight the IceViewer Application Pool > Basic Settings… on right pane.
Make sure that the .NET CLR version is No Managed Code.
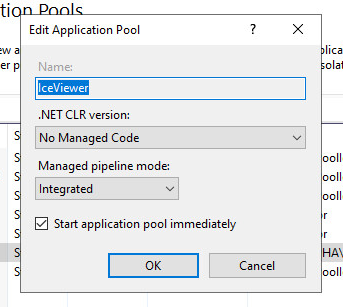
Once done, press OK to close the window, and go to Advanced Settings…
In Advanced Settings… make sure that Identity must be configured for an Administrator account.
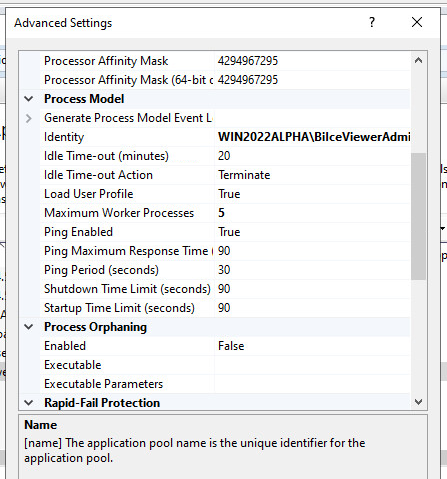
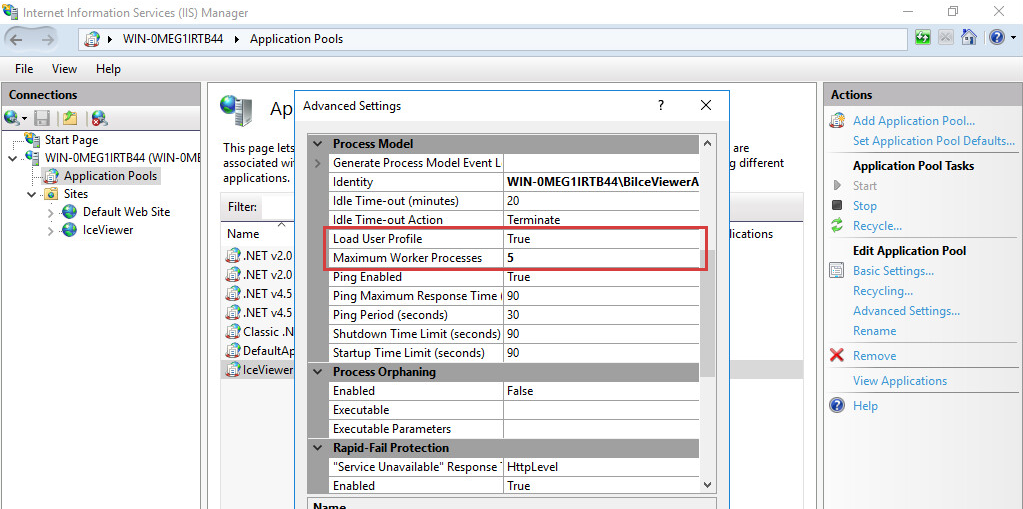
In Advanced Settings…, also make sure that Load User Profile is True, and enter at least 5 for Maximum Worker Processes.
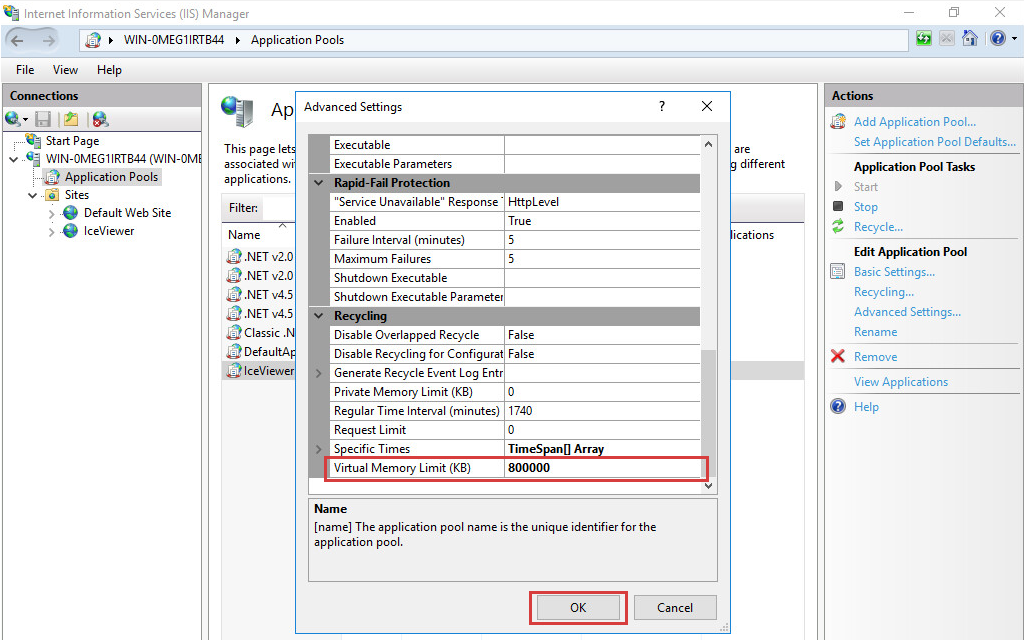
In Advanced Settings…, under Recycling section, enter at least 800000. This means if the virtual memory usage of the worker process reaches 800 MB, then it will automatically recycle. Depending on your computer memory capacity, you can configure a higher threshold. Click on the OK button when finished.
NOTE: Higher value will provide more stability for extremely large documents, and for large memory consuming operations.
The website configuration is done. Now, one should be able to access the website in the browser. For the first starting instructions, please refer to the First Start section.