Moving IceViewer HTML5 Website to another directory
By default, the IceViewer HTML5 Website is installed into the c:\inetpub\wwwroot\iceviewer folder, which is the default folder for Microsoft Internet Information Services (IIS) for websites.
| Keep in mind, that the IceViewer HTML5 Website location cannot be changed during the IceViewer HTML5 installation. Only the “Installation Directory” (c:\Program Files\Black Ice Software LLC\IceViewer HTML5\) can be changed during the installation. The “Installation Directory” contains components, libraries, and registration utilities that are not part of the IceViewer HTML5 Website. |
In given circumstances, administrators may want to move the IceViewer HTML5 Website into another drive or folder. To move the IceViewer HTML5 Website, administrators must perform the following steps:
-
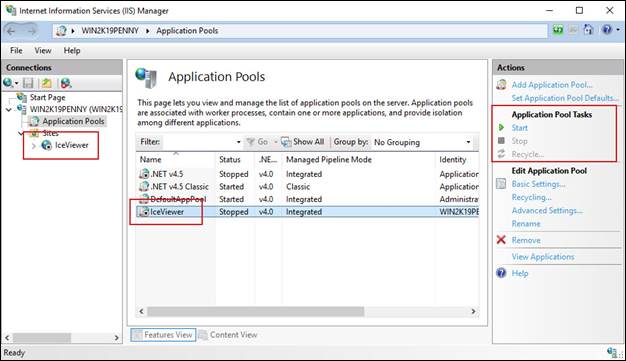
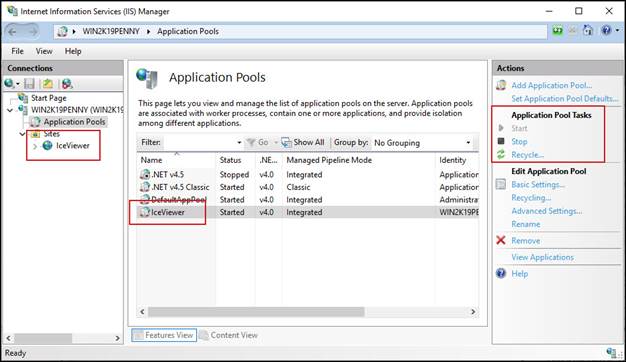
Stop the IceViewer HTML5
Website and Application
Pool in the IIS, to make sure no files are locked.
- To stop the website, go to the IIS > Sites > Select the IceViewer HTML5 website, then press Stop in the Manage Website area on the right.
- To stop the Application Pool, go to IIS > Application Pools > Select the IceViewer HTML5 then press Stop in the Application Pool Tasks are on the right.
- Move all IceViewer HTML5 files from c:\inetpub\wwwroot\iceviewer folder to the new location.
- Once the files are moved, one must change the
IIS where the IceViewer HTML5 Website files will be
loaded.
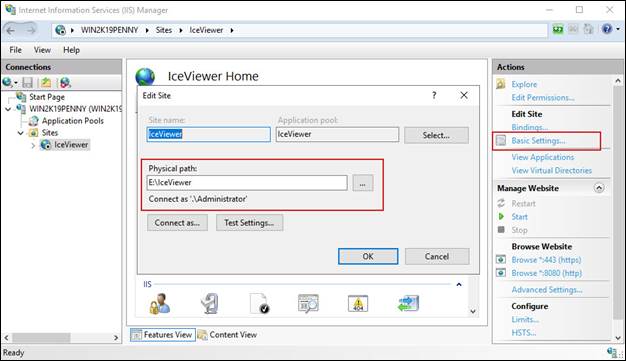
- Go to IIS > Sites > Select the IceViewer HTML5 Website, and press Basic Settings in the Edit Site area, then change the Physical path to the new location.
- Once the path is changed, open the
“appsettings.json” file in the
IceViewer HTML5 directory in the new location with any text editor,
such as Notepad.
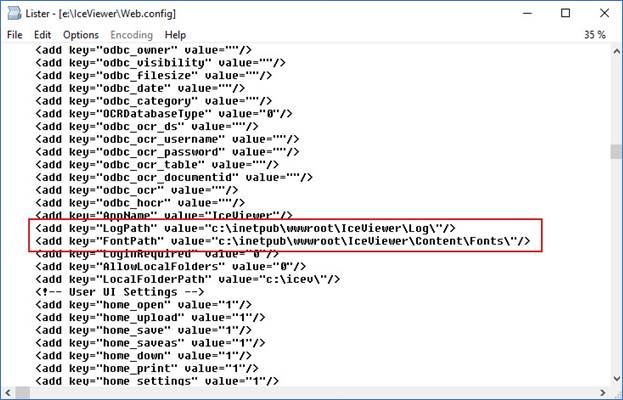
- Change the LogPath and FontPath values to reflect the new IceViewer HTML5 Website location.
- Save the “appsettings.json” file,
then Start the IceViewer HTML5
Website and Application Pool, as
in step (1).
- Try accessing the IceViewer HTML5 Website in the browser.