The Black Ice Printer Driver is capable of extracting the text information from the printed document.
The text extracted from the document is saved as a standard text file. The text file gets the same name as the printed document, but with the .txt extension.
The Text Output has the following features:
- Mail Merge
- Disable Page numbering
- Use legacy coordinates
- Detect space in text
- Formatting style for Plain Text, Formatted Text and for Coordinates and Style
- Character Set for Unicode/Eastern character support
- Line break format
- Filter glyph characters
- Glyph conversion method
- Output directory configuration
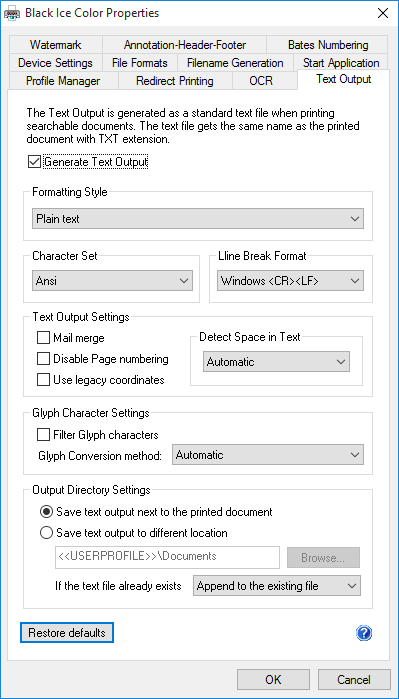
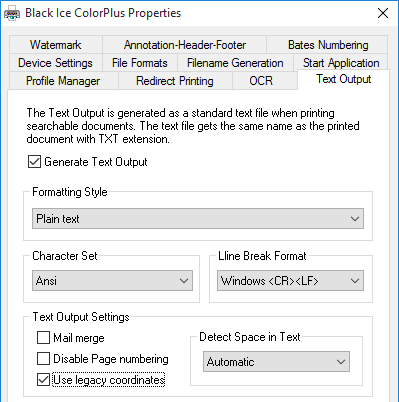
In order to enable Text Output in Black Ice printer driver, navigate to Control Panel > Devices and Printers > right click on the Black Ice Printer Driver > Printing Preferences > navigate to the Text Output tab, and check the Generate Text Output option.
>> Click Here to see an example for an extracted text file when printing a documentMail Merge
When Mail merge option is checked, the driver recognizes special character sequences in the printed text to extract information into an MRG file.
The recognized character sequences all start with the ## characters. These commands make the driver remove or alter the printed text and write it in the merged output file in text format.
Currently two types of character sequences are available in the Black Ice Printer Drivers:
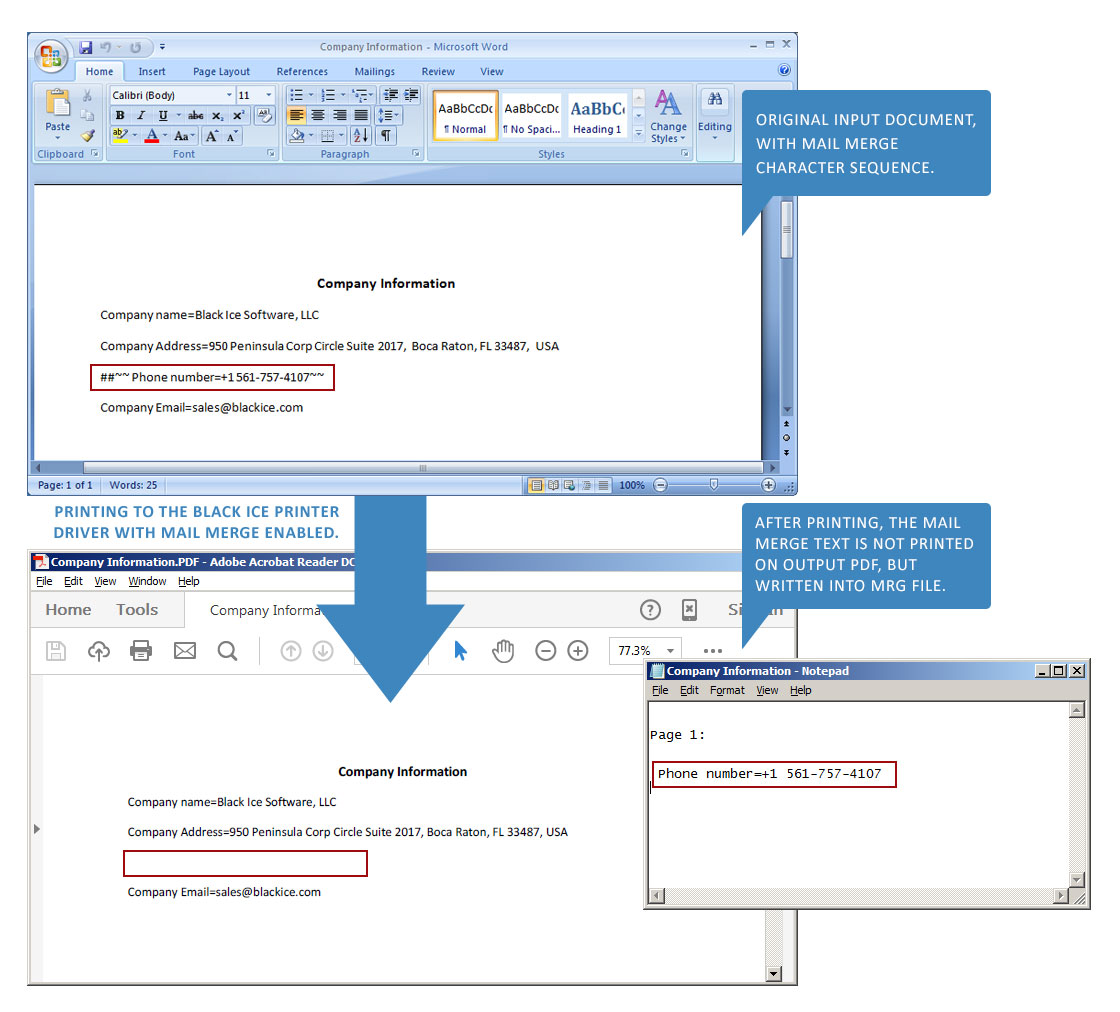
Description:
The text between the ##~~ and ~~ characters will not be printed on the output document, but will be written into the MRG file.
For example:
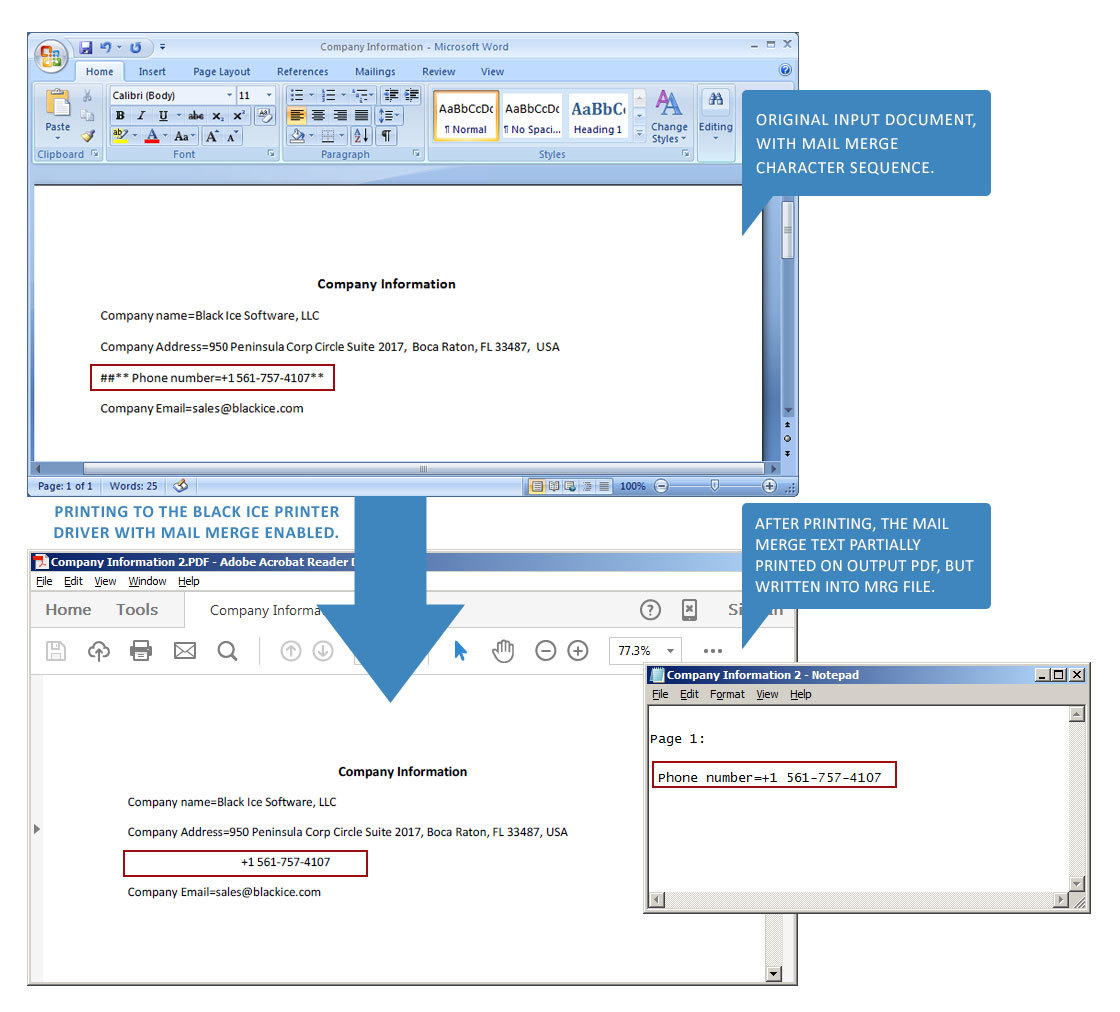
Description:
The text between the ##** and ** characters will partially printed on the output document, but will be written into the MRG file.
For example:
The MRG file has the same filename as the group file, with the .mrg extension. The actual name of this file is written in the group file in the following format: Merge Output=c:\aaaa1000.mrg
In addition, an output text file is generated containing the extracted text from the printed document including the mail merge characters.
All the above command lines must be printed as one continuous string from left to right. If they are printed one part at a time using several separate printing function calls (first printing ##~~ and then the rest of the line), the driver may not be able to correctly recognize them.
The application prints in segments if one changes font type or font size in the text. The mail merge string must be of one font type, the same font size and color. The mail merge file *.mrg also contains page delimiter information to mark where the new page started. The page delimiter is an empty line, the ‘Page 1:’ text (where the number is the current page number), and another empty line in the *.mrg file, for example:
- Page 1:
- Page 2:
- Page 3:
This information appears in the mail merge file even if there is no mail merge information on that particular page.
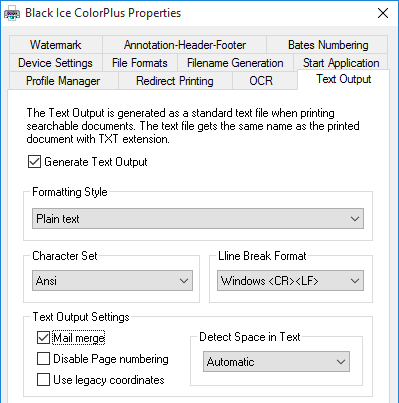
To activate the Mail merge feature of the printer driver, one must first enable the Text Output feature of the printer driver, and then click on Mail merge.
For reference, see the following screen capture:
Disable Page Numbering
If the Save each page as separate file option is unchecked, and the printed document contains more than one page, all the extracted text is saved into a single text file. The text file contains delimiters for each new page in the “Page 1:”, “Page 2:” format. If the Save each page as separate file option is checked, a separate text file is generated for each image page generated by the driver.

One can disable the Page number delimiters in the text output by checking Disable Page Numbering option.
Use Legacy Coordinates
The coordinate calculation has changed in printer driver version 14.35.
When the Use Legacy Coordinates option is enabled, the Printer Driver generates coordinates based on previous version of text extraction.
The extracted text coordinates with Use Legacy Coordinates option will be the same as with Printer Driver version 14.35 and earlier.
This option could be useful if one updated to the latest Black Ice Printer Driver, but insists to use the same coordinates for commonly extracted documents.
Detect space in text
The Detect space in text feature automatically detects the space characters between the EMF records from the input document, and inserts the spaces between the appropriate words in the text output.
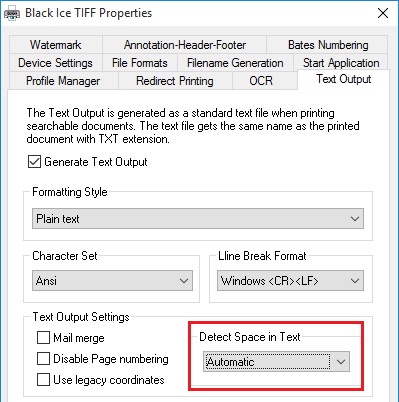
Possible options:
- Automatic option detects the space characters automatically, and inserts the spaces between the words in the generated text output. This is the recommended option.
- Always add spaces option inserts space characters between every EMF record.
- Never add spaces option does not insert space characters.
Formatting Style
Formatting style defines whether to generate plain text from the printed document, or to add font information, position and style for the generated text. Adding position, style and font information could be useful if one intend to convert the text back to formatted document.
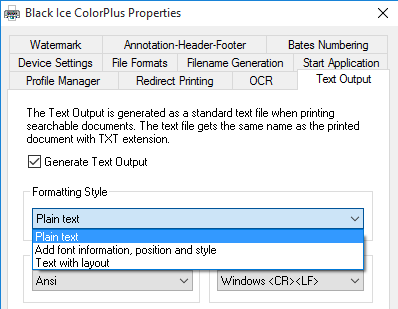
Possible Formatting style options:
- Plain text (default) – option generates plain text output without formatting, position and font information.
- Add font information, position and style – option generates text output with font information, position and style. This option is recommended if one intend to convert the text back to formatted document.
- Text with layout – option generates plain text output without font information but tries to keep the original physical layout, indent, alignment and spacing.
Character Set
By default, the text file is generated as ANSI text, however, UNICODE text is also supported. In order to turn on the UNICODE text support, select an UNICODE option from the Character Set dropdown list.
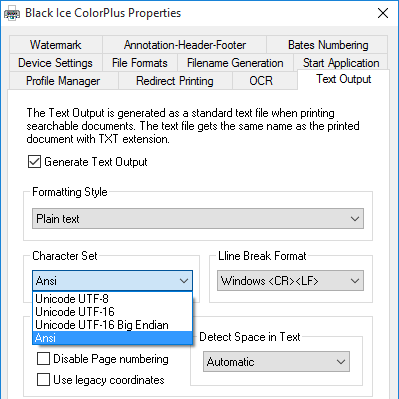
The following options are available in the Character Set dropdown list:
- Unicode UTF-8
- Unicode UTF-16
- Unicode UTF-16 Big Endian
- Ansi
When a Unicode option is selected, the driver will interpret the contents of strings printed using the TextOut function as two-byte glyph indexes. Unicode option is recommended for extracting text from documents containing Unicode/eastern characters.
Line Break format
Line Break format specifies the format of the line breaks in the generated text output.

Possible values for the Line break format are the followings:
- Windows
(default) - UNIX/Mac
- Mac
(version 9 or older)
We recommend to use Windows line break format, unless if you using legacy Unix software, or Macintosh.
Filter Glyph characters
Filter Glyph characters option is useful for filtering out glyph symbols and characters from the extracted document.
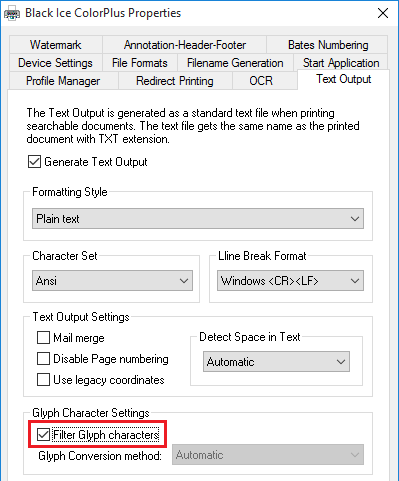
Some text is passed by the printing application to the printer driver as a series of glyph indexes of a font instead of regular characters. If this value is set to 0, the printer driver tries to convert these indexes to characters using the method defined by the “Glyph Conversion Method” value, but this is not guaranteed to work every time and may result in glyph characters appearing in the text output.
Enabling Filter glyph characters option will filter glyph indexes from the text output.
Glyph conversion method
The purpose of the glyph conversion method is to attempt to convert the glyph characters to proper text.
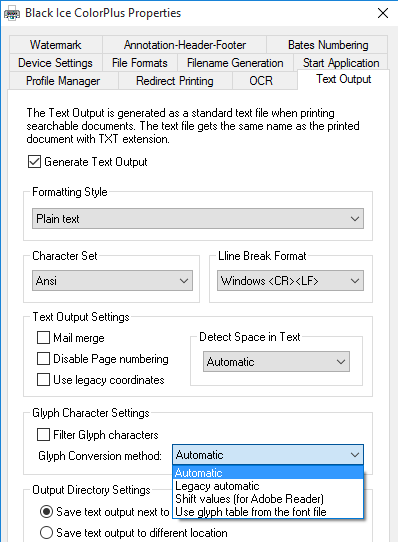
The possible values are the followings:
- Automatic (default) – This option tries to determine the appropriate method for converting glyph characters to text. The methods depend on the Character Set (Eastern Character Support) setting of the printer driver. For English text, it is recommended to use ANSI Character Set in the Text Output configuration.
- Legacy automatic – The automatic glyph conversion method has changed with Printer Driver version 14.56. This option uses the glyph conversion method from Printer Driver version 14.55 and earlier. This option could be useful to achieve the same text output as with version 14.55 or earlier.
- Use glyph table from the font file
- Shift values (mainly for printing from Adobe Reader)
Output directory configuration
One can configure where to save the Text Output generated by the Printer Driver. By default, the text output will be generated next to the printed document.
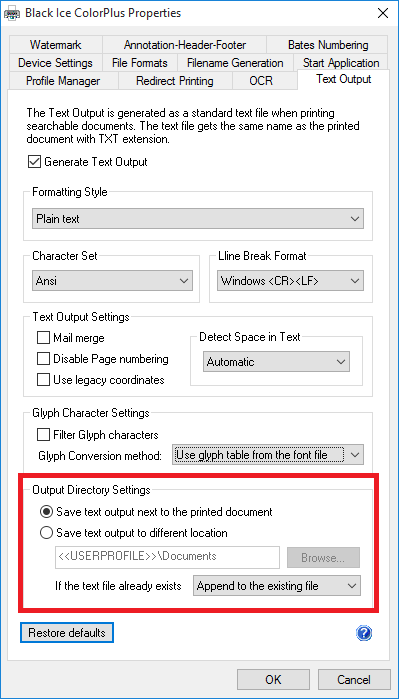
The possible options are the followings:
- Save text output next to the printed document option generates the text output next to the generated output document.
- Save text output to different location generates the text output to the specified location. One can use environment variables too to specify the location.
Possible actions if the text output file already exists:
- Append to the existing file option appends the new text output to the end of the existing document.
- Overwrite existing file option deletes the existing text output, and generates the new text output with the same filename.
- Rename the new file option leaves the existing text output file, and renames the new text output by appending a number to the end of the file. For example: Text Output(2).txt, Text Output(3).txt.
The Extract Text feature is included in the following Black Ice printer drivers: