
Add new Workflow
One can add a workflow for every user or the current user (other users on the system will not be able to see the Workflow printer driver). It is recommended to add the workflow to every user.
To add a new Workflow to every user, please run Print2Email Server as an Administrator.
Please navigate to the Print2Email Server > Workflows tab.
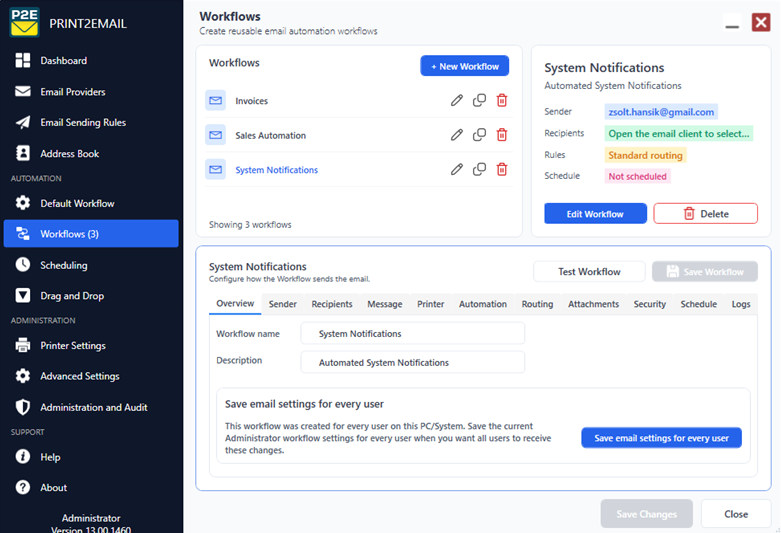
Click on the + New Workflow button.
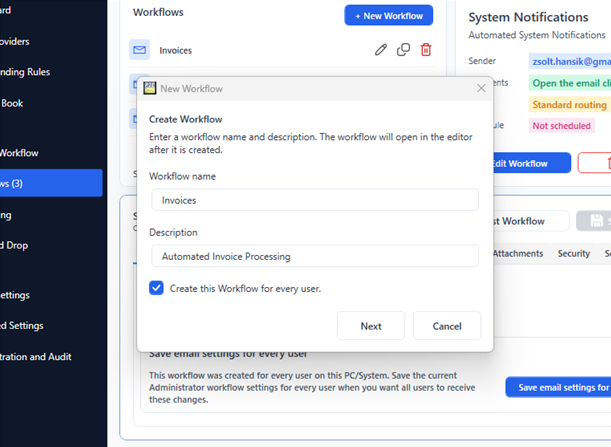
The following options are available:
- Workflow name - Type the name of the workflow and printer as it has to appear on the system.
- Description (optional) - Enter a description for the workflow.
- Create this Workflow for every user - If this option is enabled, the workflow will be created for every user on the computer. Otherwise, it will be only available for the current user.
NOTE: Administrator privileges are required to create a workflow for every user. Please make sure that the Print2Email Server is running under administrative privileges.
Click on the Next button to proceed.
On the next scene, you’ll be able to select a preconfigured starting configuration for the workflow, or start a blank workflow.
A blank workflow will use the Print2Email settings as a starting point for the configuration.
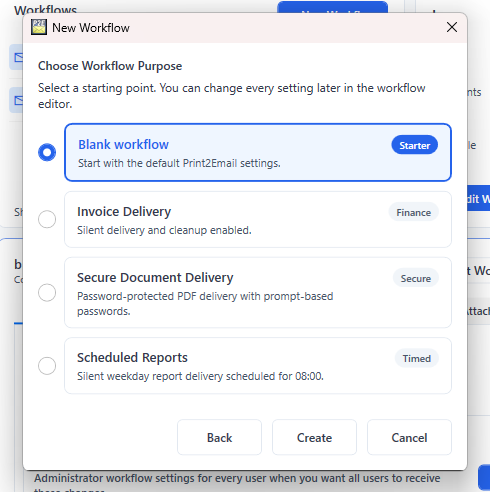
Click Create to finish creating the workflow.
You can continue configuring the workflow on the appearing editor area, by navigating between the tabs, as seen on the following image.
Once the configuration is done, click on the Save Workflow button to save the settings.
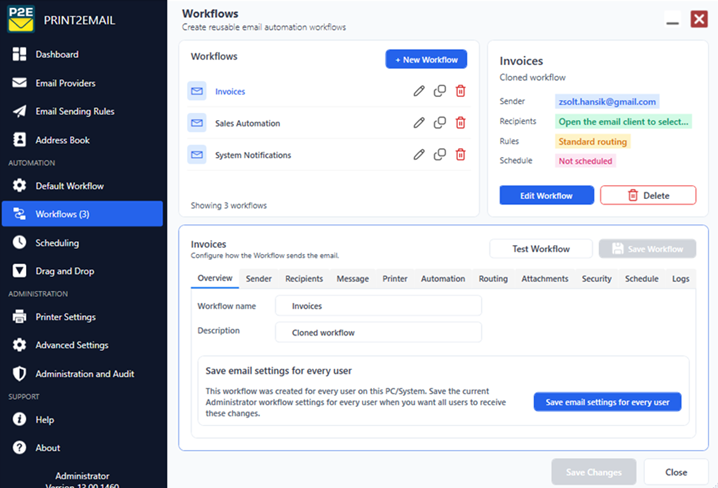
To save the workflow configuration for every user, click on the Save email settings for every user.
For more information about how to edit existing Workflows, please refer to the following sections: