Starting with the Windows updates released on August 10, 2021, Microsoft requires administrative privileges to install printer drivers by default.
The updates were intended to fix the CVE-2021-34481 security vulnerability.
To share a printer on the host computer, please see the following steps:
1. On Windows 11, please navigate to Settings > Bluetooth & devices > Printers & scanners > Click on the printer > Printer properties.
On Windows 10, please navigate to Control Panel > Printers and Devices, right-click on the printer you would like to share, and click on Printer Properties.
On Windows 2016 or newer server systems, please navigate to Control Panel > Printers and Devices, right-click on the printer you would like to share, and click on Printer Properties.
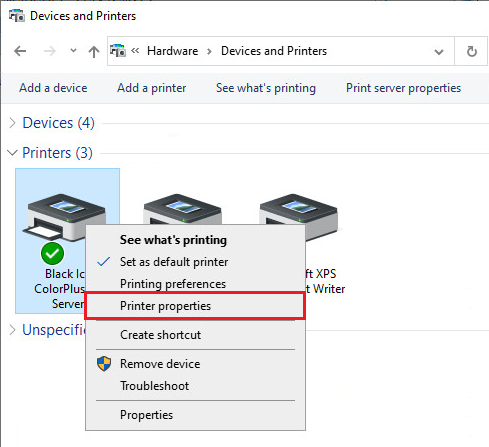
On Windows 2012 and older systems, please navigate to Start > Control Panel > Hardware > Devices and Printers > Right-click on the Printer > Printer Properties.
2. On the Printer Properties window, please navigate to the Sharing tab, enable the Share this printer checkbox, and enter a Share name for the Printer Driver. The printer will be displayed with the entered name on the network.
3. When finished, click on the Apply button. The Printer Driver is shared successfully.
Adding the Shared Printer to the Client Computer
Before users can attach the shared printer to their client systems, the Administrator must install the Printer Driver on each client system.
If manual installation is required, the driver packages are available in the Black Ice Printer Driver installation directory.
[Installed Black Ice printer driver path]\Driver\
For example, the path for the Black Ice ColorPlus X1 Server Printer Driver:
C:\Program Files\Black Ice Software LLC\ColorPlus X1 Printer Driver\Driver\
Installing the Driver Package Manually
To install the driver package manually on a client system, follow the steps below:
1. Log in to the client system with administrative privileges.
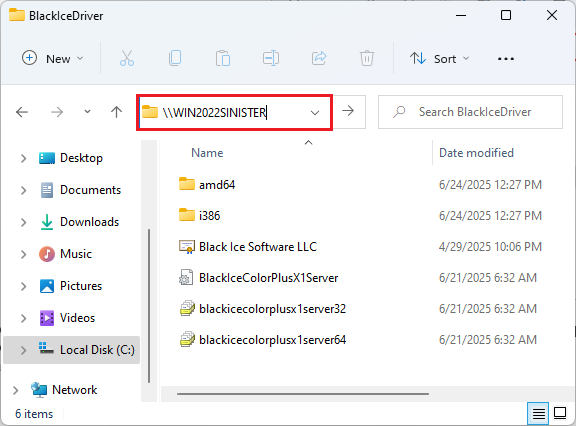
2. On the host, copy every file from the following printer driver installation directory:
[Installed Black Ice printer driver path]\Driver\
to a local folder on the client, for example:
C:\BlackIceDriver\
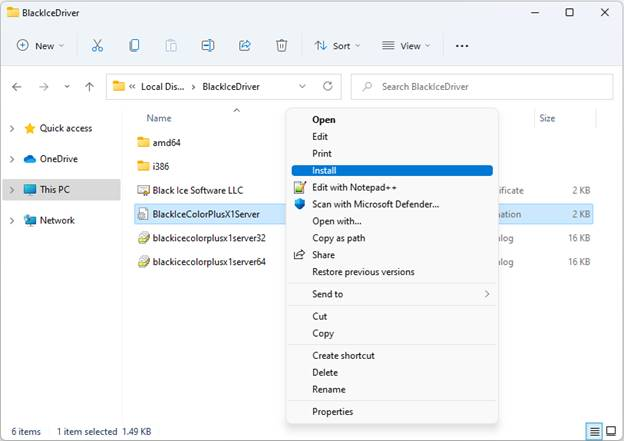
3. In the destination folder (C:\BlackIceDriver\), right-click on the INF file and select the Install option from the context menu.
Example INF file for the Black Ice ColorPlus X1 Server Printer Driver: BlackIceColorPlusX1Server.inf
Once the driver package is installed by the Administrator, the shared printer can be installed by any user.
Attaching the Printer to the Client Computer
To attach the shared printer to the client computer, follow the steps below:
1. Log in with the user account that will use the printer.
2. Open File Explorer and browse to the print server using the hostname (\\hostname):

3. Enter the credentials of the host computer, and please make sure to enable the Remember my credentials checkbox.
Administrator privileges are not required for this step.
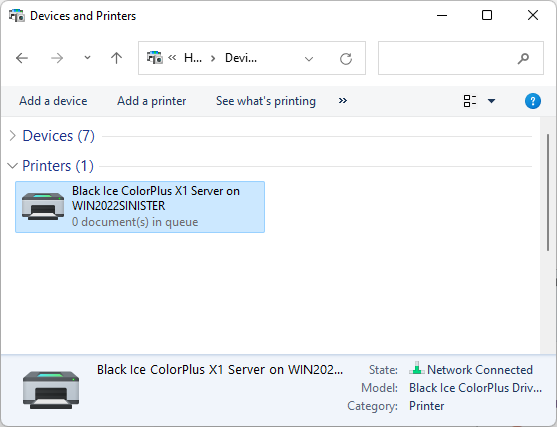
4. Right-click on the shared printer and click Connect.

5. The shared printer has been successfully added to the client computer.

If the clients are in the same domain, one can use Group Policy to attach the shared printers. For more information, please see the Adding Shared Printer driver through Group Policy section of the manual.
For more information, please see the following Microsoft article: