Print2Email is shareable over the network.
To share the Print2Email Printer on the network, follow the instructions below to set up the printer sharing correctly.
NOTE: When the Print2Email is shared out from the Host to a Client, only the silent email sending is available.
Terminology:
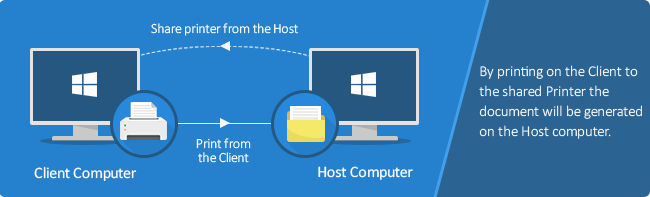
Host: the host is where the base printer driver is installed.
Client: The client is where the printer driver is shared out too.
Sharing Process:
1. Install the Print2Email printer driver on the Host.
2. Configure the Print2Email printer driver on the Host as an Administrator. The most important configuration is the Output directory for the Client.
To configure the printer driver for sharing, please click here.
When printing on the client the document conversion and output will be generated on the Host.
3. If the output directory is on the Client please click here.
4. If the output directory is on the Network driver please click here.
5. Once the printer driver configured and it is tested, the printer driver can be shared out manually or through group policy.
Note: The shared printer on the client computer will be added only to the current user.
Sharing the Print2Email Printer Driver
Throughout this section the following terminology is used:
Host Printer: The Print2Email Printer Driver installed and shared on a system is the “host” machine. The term “host” does not necessarily mean a Windows Server operating system.
Client Printer: The “Client” system’s printer, prints on the “host” printer. The shared Print2Email “host” printer driver adds a network printer to the “client” system. This “client” printer will generate an output on the “host” printer driver.
Before the Print2Email printer is shared from the Host, preconfigure the Printer Driver settings, navigate to Control Panel > Printers and Devices > right-click on the Print2Email> Printer Properties > Advanced > Printing Defaults and configure the printer driver. Changing the printer driver setting through the Printing Preferences will have no effect on the shared printer on the client. The shared printer on the Client can be custom-configured through Printing Defaults or Printing Preferences.
Before the Print2Email printer is shared from the Host, the Print2Email settings also have to be configured. Print2Email does not display email sending window when a user is trying to print from a client computer. The Print2Email only supports silent email sending on shared Print2Email printers. The silent email-sending options have to be configured on the host computer, where the Print2Email is installed.
Navigate to the Email Settings, and on the General tab please select the “Send all emails automatically to the same address” option and set the email addresses in the To field.
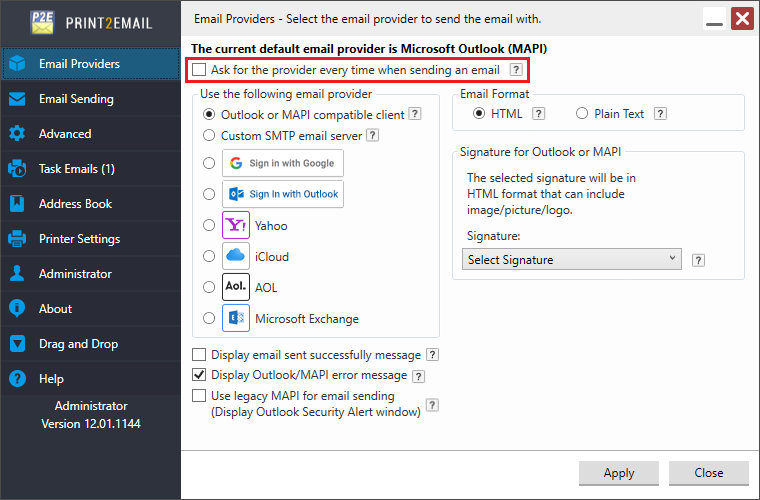
On the Email Providers tab, one has to configure the default email provider and disable the Ask for the provider every time when sending an email option.
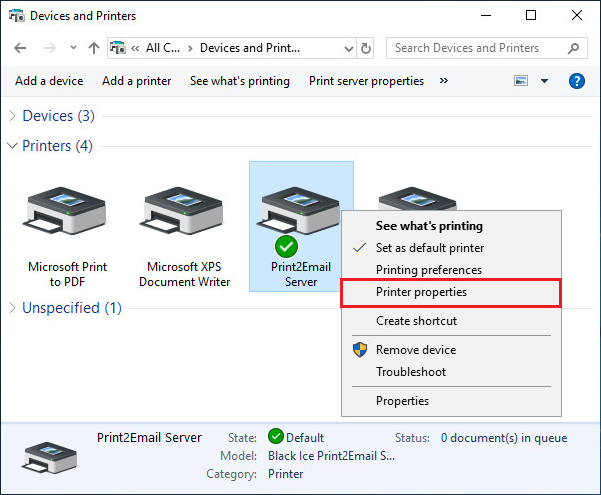
To Share a Black Ice Printer Driver, on Windows 2019 or newer server systems or on Windows 10, go to Control Panel > Printers and Devices and right click on the printer you would like to share, and click on Printer properties.
On Windows 11, go to Settings > Bluetooth & devices > Printers & scanners > Click on the printer > Printer properties.
On Windows 2016 and older systems Printers > right click on the Printer > Properties.
On the Sharing tab, check the Share this printer checkbox, and enter a Share name. The printer will be displayed with this name on the network.
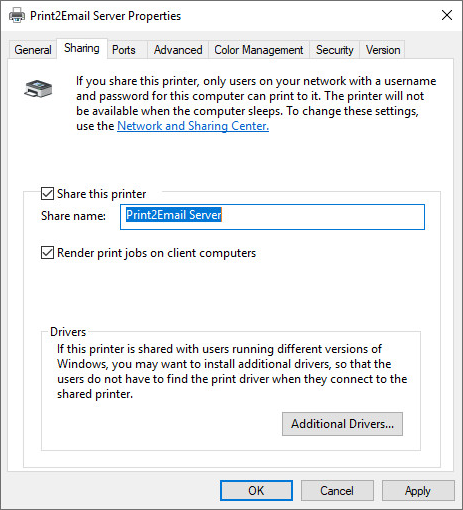
When finished, click on the Apply button. The Printer Driver is shared successfully.
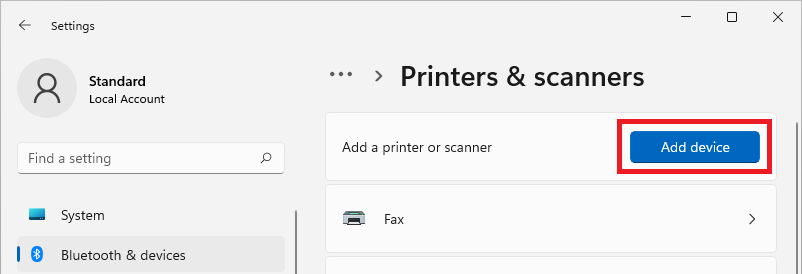
To add the shared printer on the client computer, on Windows 11 systems, go to Settings > Bluetooth & devices > Printers & scanners and click on the Add device option.
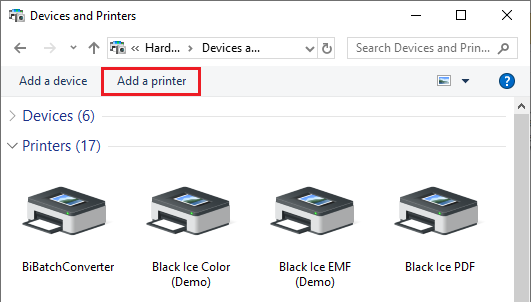
On Windows 10 or older devices, go to Control Panel > Devices and Printers and click on the Add a printer option.

Follow the instructions of the Add Printer wizard, and add the network printer.
Since the August 2019 Windows updates, Administrator privileges are required to install printer drivers.
If you are not logged in as an Administrator and the drivers have not been installed on the client system yet, Windows will ask for the Administrator’s name and password. Enter the Administrator’s name and password and click Yes.

It is also possible to remove the restriction that only allows Administrators to install the drivers.
For more information, please see the Microsoft Knowledge Base article KB5005652.
Alternatively, the Printer Driver can be manually copied from the Host system and installed on the Client system before the Shared Printer is attached. Please click here for more information.
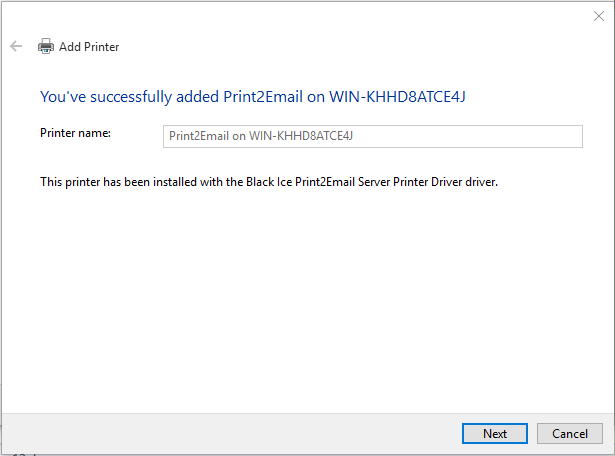
If the printer driver is added successfully, the following window appears.

The shared printer is successfully added on the client computer.
Further required actions prior to Print2Email version 11.10:
Once the Shared Print2Email printer is added on the client computer, please navigate to the Admin tab and select Save settings for every user on the host computer.
Please note, the Save settings for every user button must be also pressed, every time when changing the Print2Email settings on the Host, in order to apply the changes to the shared printers on the client.
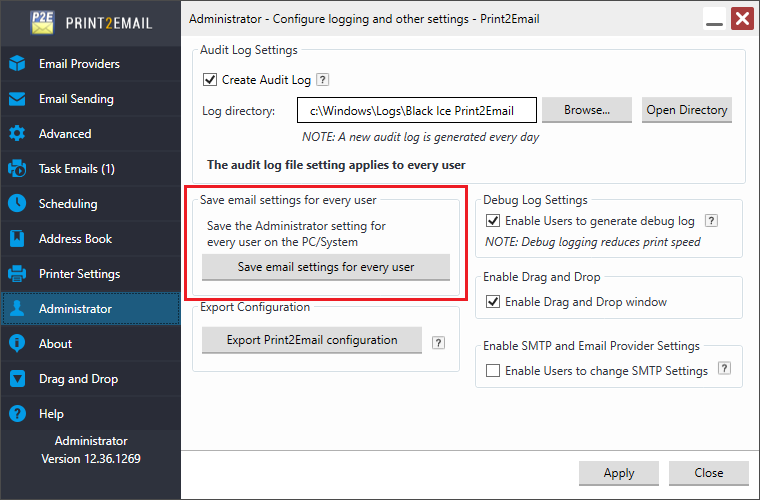
NOTE: Saving email settings for every user requires Administrator privileges.