Windows updates released on August 10, 2021, and later will, by default, require administrative privilege to install printer drivers.
The updates were intended to fix the CVE-2021-34481 security vulnerability.
To share a printer on the host computer, please follow these steps:
1. Open the Start menu > start typing "printers and scanners" to open the Printers & scanners window.
- On Windows 2016 or newer server systems: Click on the Black Ice Printer Driver > Manage > Click “Printing preferences”.
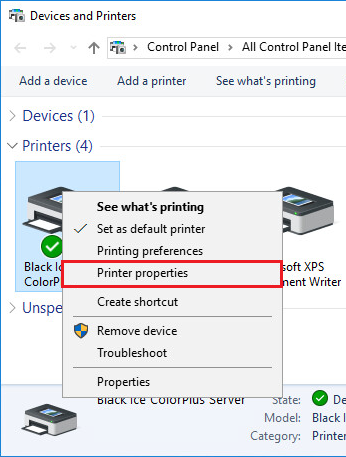
- On Windows 2012 and older systems go to Start > Control Panel > Hardware > Devices and Printers > Right-click on the Printer > Printer Properties.
- On Windows 11 Desktop systems: Click on the Black Ice Printer Driver > Click “Printing preferences”.
- On Windows 10 Desktop systems: Click on the Black Ice Printer Driver > Manage > Click “Printing preferences”.
2. On the Sharing tab, check the Share this printer checkbox, and enter a Share name. The printer will be displayed with this name on the network.
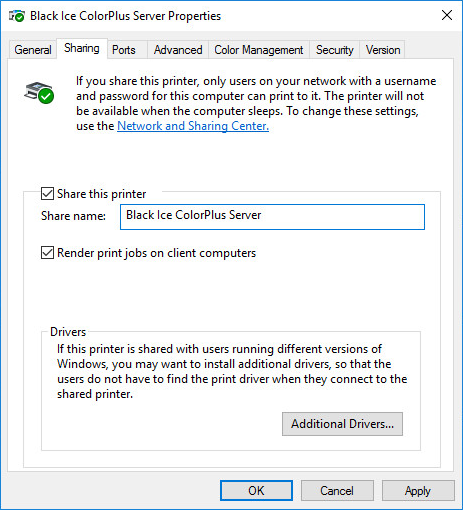
3. When finished, click on the Apply button. The Printer Driver is shared successfully.
To attach the shared printer on the client computer, please follow these steps:
1. Please log in to the client computer as Administrator.
If the client has no administrative privileges, please see the Attaching the Shared Printers Without Administrative Privilege section of the Printer Driver Manual.
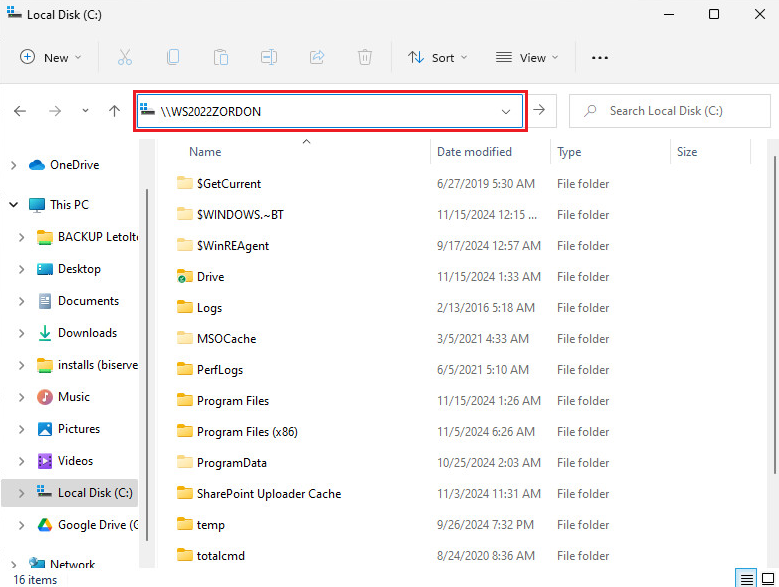
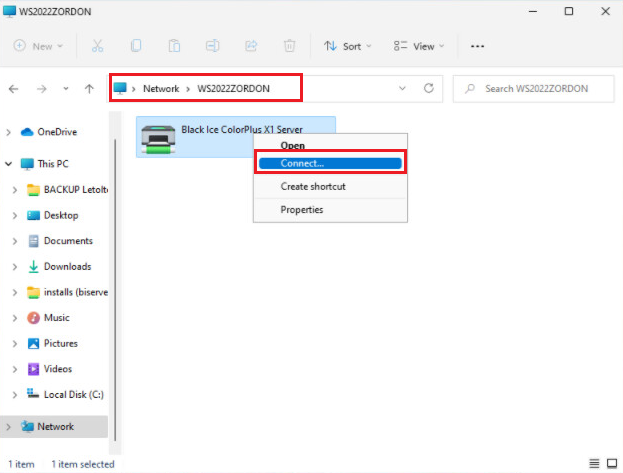
2. Browse to the Print Server in File Explorer (\\hostname):
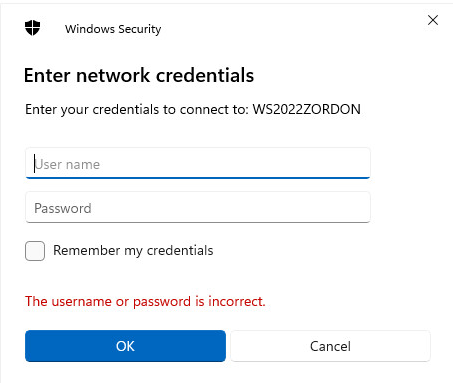
3. Enter the credentials of the host computer on the following window:
4. Right-click on the shared printer and click Connect.
If the clients are in the same domain, you can use Group Policy to attach the shared printers.
For more information, please see the Adding Shared Printer driver through Group Policy page.
For more information, please see the following Microsoft article: