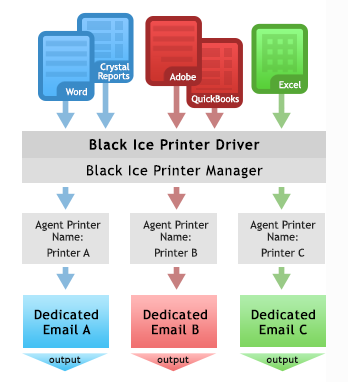
The Black Ice non-OEM document converter printer drivers are installed with the Printer Manager utility. The Printer Manager can create Agent Printers from the installed Printer Driver. These Agent Printers can be configured to email a document to multiple dedicated email addresses without any user interaction. To do this, follow the instructions below.
For more information on agent printers, check the Agent Printers section of this manual.
Create the Agent Printers for email sending.
1. When the Agent Printers are created, go to the General tab of the Printer Manager. Select the Agent Printer from the drop-down list, and click on Printing Preferences.
2. In the Printing Preferences window navigate to the Filename Generation tab, and check the Send printed document in email in the Email section, and click on Edit Email settings to configure the SMTP settings of the email.
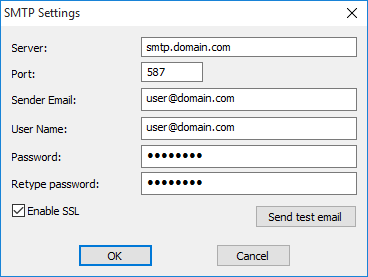
Server - Enter the SMTP server address.
Port - Enter the correct SMTP port for the mail server (25 by default).
Sender Email – The sender email address.
User Name - Username for the email account to be used for sending.
Password - Password for the email account to be used for sending.
Retype password - Re-enter password.
Enable SSL - Enable this checkbox if SSL authentication is required by the mail server.
Send test e-mail - Verifies SMTP settings by sending a test email to the account designated above.
Preconfigured Email Settings
If the Send emails silently option is enabled, users can preconfigure the email preferences including the Sender name, To, Cc, Bcc, Subject and Body, which results silent email sending without any user interaction. If the user prints to the Black Ice Printer Driver will send the email in the background.
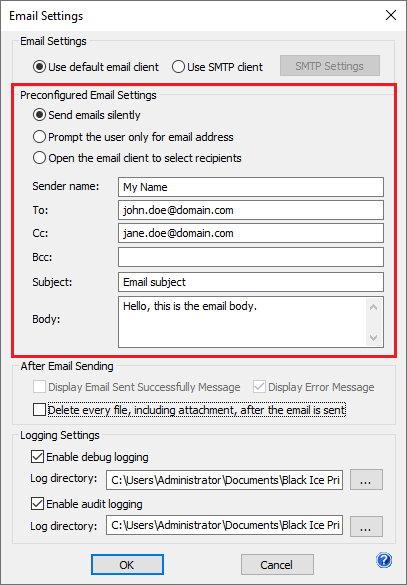
The Preconfigured Email Settings section provides the option to send emails without user intervention by pre-setting the destination address, destination CC, destination BCC, subject, and body.
Send e-mails silently - Enable this checkbox to deliver emails automatically, using the information provided in the subsequent fields:
Sender Name: the displayed name of the sender
To: destination email address
CC: destination CC address
BCC: destination BCC address
Subject: email subject
Body: email body
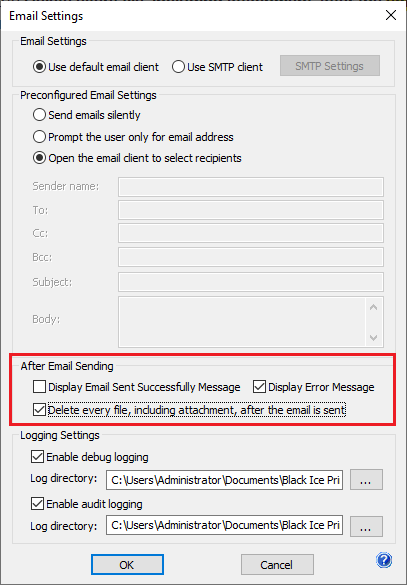
After Email Sending
If Display Email Sent Successfully Message checkbox is selected, the email confirmation message will display after successful sending the email.
If Display Error Message checkbox is selected, error message will display when email sending generates an error response.
If the Delete every file, including attachment, after the email is sent option is enabled, the Printer Driver will delete the printed document and attachments after the email is sent successfully.
Logging Settings
The Logging Settings section provides information regarding the delivery of email messages.
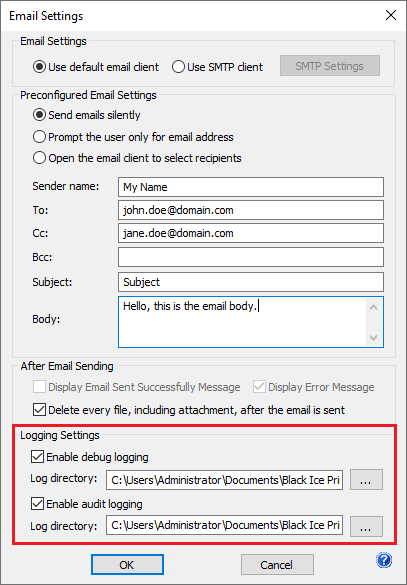
Enable debug logging
Enable the Enable debug logging checkbox to save the log file information.
Log directory - The output directory of the log file.
NOTE: Environment variables can also be used to specify the directory.
NOTE: Select a place for the logs where all printer driver users have permission to write.
The Printer Driver creates log files with the name of the date, which means, if the user uses the Email Sending feature on 20th of February 2014, the Printer Driver creates the following log file into the specified directory:
C:\temp\EmailSendingLogs\02_20_2014.log
Enable Audit logging
Log directory - The output directory of the log file.
NOTE: Environment variables can also be used to specify the directory.
When Audit Log creation is enabled, Printer Driver will log every sent email, date, recipients and the username who sent the email. This option is recommended to Administrators to monitor the outgoing emails sent by Printer Driver.
1. Repeat Steps 1-2 for every Agent Printer, created for email sending.
If ready, simply print to Printer A, and the printed document is sent to the dedicated email address of Printer A. Print to Printer B, to email the document to the dedicated email address of Printer B, and so on.