To Share a Black Ice Printer Driver, first create and configure the Agent Printer you would like to share based on the Adding a new Agent Printer section of the manual. For configuring Agent Printers for all users on the computer, please follow the Configuring Agent Printers for every user section of the manual.
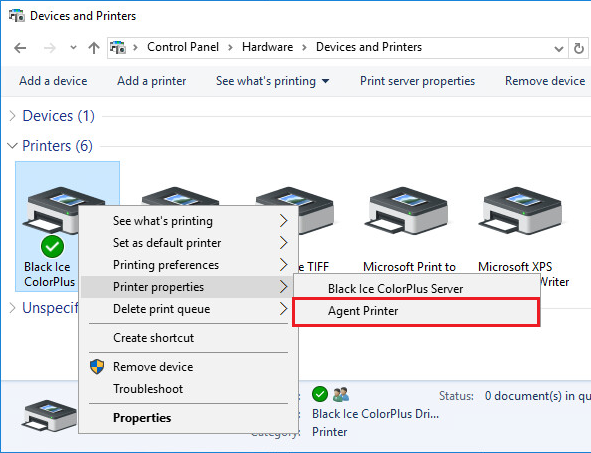
When the Agent Printer is created and configured, open the Printer Properties:
On Windows 11 systems, go to Settings > Bluetooth & devices > Printers & scanners > Click on the Agent printer you would like to share > Printer Properties
On Windows Server systems or Windows 10 or older Desktop systems go to Control Panel > Printers and Devices and right-click on the Agent printer you would like to share, and click on Printer properties. If you cannot see the Agent printer, right-click on the base Black Ice printer, and you will see a list of the Agent printers under the Printer properties item.
On the Sharing tab, check the Share this printer checkbox, and enter a Share name. The printer will be displayed with this name on the network.
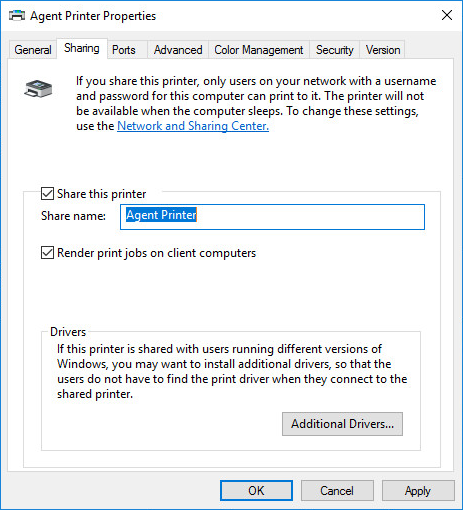
When finished, click on the Apply button. The Printer Driver is shared successfully.
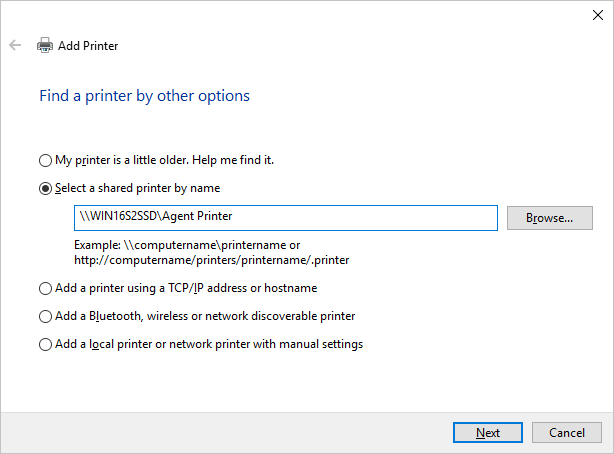
To add the shared printer on the client computer, on Windows 11 systems, go to Settings > Bluetooth & devices > Printers & scanners and click on the Add device option.

On Windows 10 or older devices, go to Control Panel > Devices and Printers and click on the Add a printer option.

Follow the instructions of the Add Printer wizard, and add the network printer.
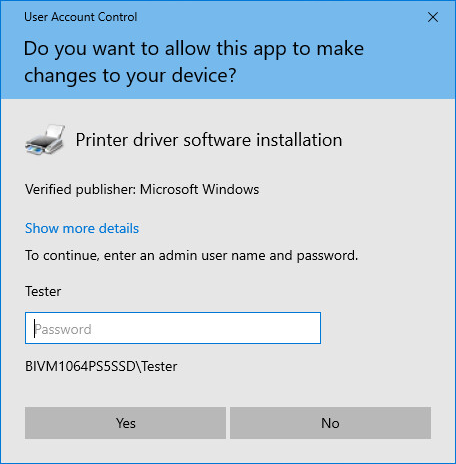
Since the August 2019 Windows updates, Administrator privileges are required to install printer drivers.
If you are not logged in as an Administrator and the drivers have not been installed on the client system yet, Windows will ask for the Administrator’s name and password. Enter the Administrator’s name and password and click Yes.
It is also possible to remove the restriction that only allows Administrators to install the drivers.
For more information, please see the Microsoft Knowledge Base article KB5005652.
Alternatively, the Printer Driver can be manually copied from the Host system and installed on the Client system before the Shared Printer is attached. Please click here for more information.
If the printer driver is added successfully, the following window appears.
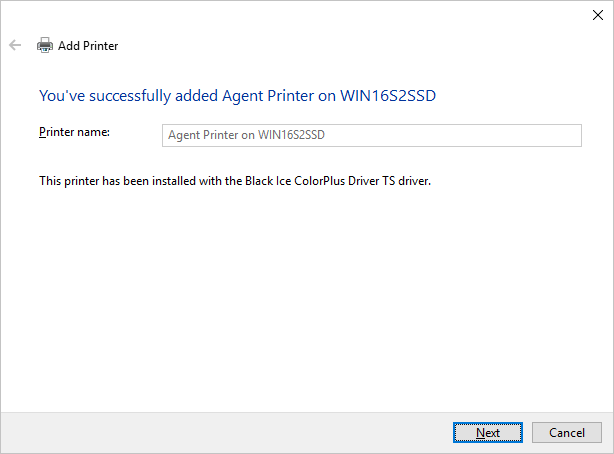
The shared Agent printer is successfully added to the client computer.