The Black Ice Virtual Printer Driver seamlessly integrates with existing point-of-sale (POS) systems to facilitate a range of tasks that may not be satisfied by current turn-key solutions.
Integration Steps
· Replace Physical Printer: To integrate the Black Ice Virtual Printer into an existing POS system, replace the physical receipt printer with the Black Ice Virtual Printer.
· Redirect Printing: Configure the Black Ice Virtual Printer Driver to redirect printing to the physical receipt printer.
Advantages of the Virtual Printer
The key advantage of using the Black Ice Virtual Printer between the POS system and the physical receipt printer is that background tasks are completed seamlessly with a single click when printing a receipt. This eliminates the need for user interaction.
Once the Black Ice Virtual Printer is in place, you can configure it to accomplish several tasks, including:
· Archiving Receipts: Store receipts in PDF format on a local hard disk for easy access and organization.
· Database Integration: Send receipts directly to your database for seamless record-keeping.
· Secure Storage: Choose to transfer receipts to an FTPS storage or a secure HTTPS web server for data security.
· Email Receipts: Enhance the customer experience by automatically emailing receipts to customers.
· Extract text: Extract the content of the printed receipt for additional analysis that may not have existing POS systems.
Basic Configuration
This section covers the fundamental steps to configure the Black Ice Virtual Printer Drivers with a physical receipt printer. Please follow these instructions to seamlessly integrate the Black Ice Virtual Printer into your POS system and take advantage of its versatile features.
1. First, please check what paper size the receipt printer uses.
E.g., for an Epson printer, you can find this information in Control Panel >Right-click on the receipt printer > Printing Preferences >Advanced:
In this example, the 3276 mm is only the maximum length of a page; the printer automatically cuts the paper where the content ends on the page.
Please make sure the automatic cutting works correctly when printing to the receipt printer directly.
2. Please make sure the paper size of the receipt printer is set correctly in the Printer Driver.
On Windows 11, please navigate to Settings > Bluetooth & devices > Printers & scanners > click on the printer > Printer properties > Advanced > Printing Defaults > Device Settings tab.
On Windows 10, please navigate to Control Panel > Printers and Devices > right-click on the printer > and click on Printer Properties > Advanced > Printing Defaults > Device Settings tab.
On Windows 2016 or newer server systems, please navigate to Control Panel > Printers and Devices, right-click on the printer > and click on Printer Properties > Advanced > Printing Defaults > Device Settings tab.
On Windows 2012 and older systems, please navigate to Start > Control Panel > Hardware > Devices and Printers > right-click on the printer > Printer Properties > Advanced > Printing Defaults > Device Settings tab.
Please select the paper size of the receipt printer from the Paper dropdown list. Predefined roll paper sizes automatically cut the paper at the end of the printed content. If the desired size is not available, click Edit Paper List… and add a custom paper size. For more details, refer to the Add or Edit Custom Paper Sizes section of the manual.
3. Please make sure the graphic resolution is configured correctly based on the specification of the receipt printer.Most receipt printers use 203 x 203 DPI.
On the Device Settings tab, please click the Edit Resolutions… option and click the Add new… button to create a custom resolution. Please define the Horizontal and Vertical values, and the name of the custom resolution, and click the OK button.

On the Device Settings tab, please select the added resolution from the Resolution dropdown menu.
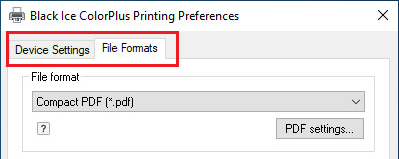
4. Please navigate to the Redirect Printing tab, enable the Enable redirect printing option, disable the Prompt the user to select the printer during printing option, and add the receipt printer to the Selected Printers to Redirect list.

5. Click Apply to save the settings, and please restart the application you print from.
For additional features to be used with POS systems, please see the following sections.
To configure custom file naming to include in the file name the exact time when the receipt is printed, please click here.
To configure to email the receipt to the customer, please click here.
To extract the content of the printed receipt for additional analysis, please click here.