The ASP.NET HTTP Upload server side sample is a simple website which demonstrates how to upload and save documents on a web server from the HTTP Upload utility.
Using the website
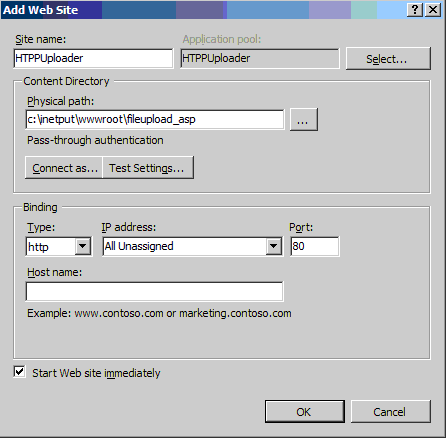
In order to use the website, one must have a working web server, with ASP.NET language support. The recommended web server is Microsoft IIS. Copy the files and components to the folder, where the websites are located, and setup a new website in the web server.
Once the website is configured, you can setup the configured host/domain name in HTTP Uploader. For simple file uploading without parameters, use the ReceiveUpload_single.aspx file, for parameters, use the ReceiveUpload.aspx file. For example:
www.mydomain.com/ReceiveUpload_single.aspx
www.mydomain.com/ReceiveUpload.aspx
Uploading files
The ASP.NET server side sample receives the POST request with the file from the HTTP Uploader then initiates the uploading.
If one uses the ReceiveUpload_single.aspx, then the ASP.NET server side uploads the file without validating or checking any parameters.
If one uses the ReceiveUpload.aspx, then the ASP.NET server side validates the required password and username parameters, and also validates the optional custom parameter, if it’s not empty.
If every parameter is validated correctly, the webpage saves the file on the server. It a file already exists with the same name, the page overwrites the file.
The file will be uploaded to the following location: /uploads
Return codes
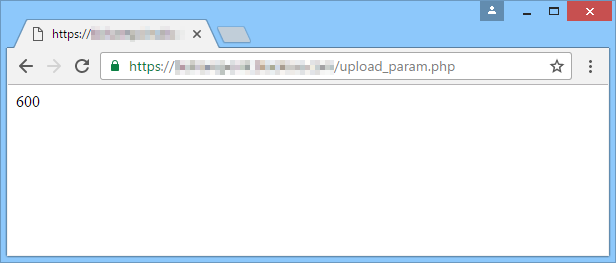
After uploading a document, the ASP.NET web page returns a string to the client side of the page, informing the HTTP Uploader if the uploading was successful or not. The return codes starts from 600, to avoid confusion with standard HTTP status codes (200, 404, 500, etc.).
Return code 600 means the file has been uploaded successfully. For more information about the available return codes, please refer to the Error Code Definitions section.
Modifying the expected username and password values
In this sample, the ASP.NET webpage expects a hard coded username and password to upload the document. In order to modify the hard coded values, one must edit the following section in the ReceiveUpload.aspx.cs file:
//Defining the correct values.
//These values can be changed according to customer’s needs.
string username = "tester";
string password = "Blackice12345";
string custom = "12345";
One can modify the username, password and custom string variables to other login credentials, or to SELECT the appropriate username and password from a database, depending on their needs.
Modifying the ASP.NET webpage, to not validate the custom parameter value
In order if the custom parameter is not needed, one can remove the custom parameter validation from the ASP.NET code, by changing the following line in the code:
//**Change:
//Checking if the received parameter values are correct, or if the custom parameter is empty.
if ((post_username == username && post_password == password) && (post_custom == custom || post_custom == ""))
//**Change to
//Checking if the received parameter values are correct, or if the custom parameter is empty.
if (post_username == username && post_password == password)
Test the webpages, by uploading from the browser
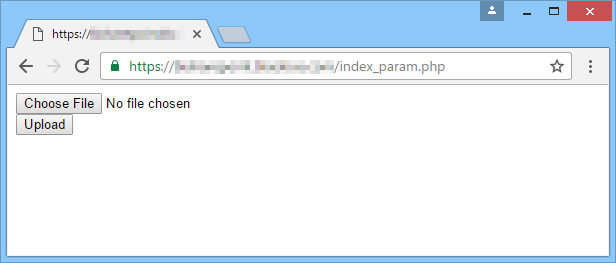
The sample provides simple HTML forms, which could be used to upload documents from the browser. These HTML forms can be used to test the uploading without using the Printer Driver or HTTP Uploader utility.
To access the forms in the browser, type one of the following link into the browser:
www.mydomain.com/index.html
www.mydomain.com/index_single.html
Index_single.html can be used to upload one file without any parameter, using the ReceiveUpload_single.aspx file.
Index.html can be used to upload one file with predefined parameters, using the ReceiveUpload.aspx file.
Click on the Choose File in order to browse and select a file to upload, and click on the Upload button to initiate the uploading.
The webpage displays the return code, once the uploading has been finished.
For more information about the return codes, please refer to the Error Code Definitions page.
Files and Components
fileupload_asp\ - Website folder containing the website components.
uploads\ - Directory to upload the files to on the server.
web.config – Web config file
index_single.html – Client side page, for testing ASP.NET upload through the browser without parameters
index.html– Client side page, for testing ASP.NET upload through the browser with parameters
ReceiveUpload_single.aspx.cs – ASP.NET script to upload the files without parameters
ReceiveUpload_single.aspx – ASP.NET script to upload the files without parameters
ReceiveUpload.aspx.cs – ASP.NET script to upload the files with parameters
ReceiveUpload.aspx – ASP.NET script to upload the files with parameters