The Black Ice Printer Drivers supports using UNC paths and shared network folders, to let users to access their printed documents from the client computer through the network.
Explanation:
Client: Client computer is where the Black Ice Printer Driver is installed.
Host: Host computer is where the shared folder is configured and located.
To properly configure an UNC path, please perform the followings:
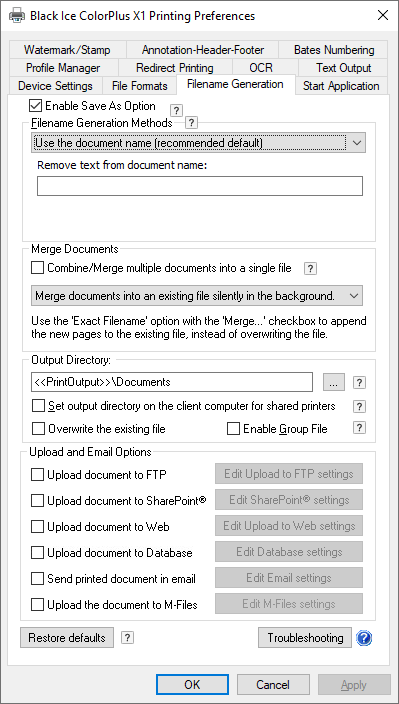
On the Client, navigate to Devices and Printers > Right click on the Printer Driver > Printing Preferences > Filename generation and set the output directory.
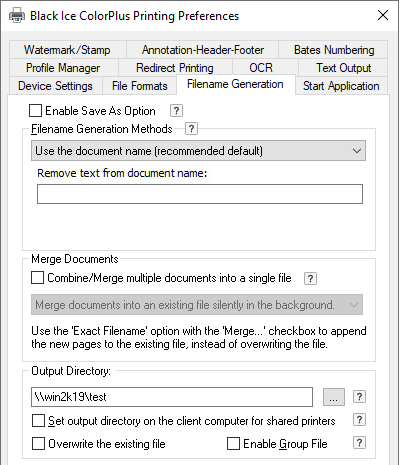
If you use environmental variables, you can use the <<USERNAME>> environment variable in the output directory. E.g.: \\server\userdata\<<USERNAME>>\documents
If the Printer is set to the following output directory: \\server\userdata\<<USERNAME>>\documents and you are printing as the User “TestUser”, please make sure you create the folder \\server\userdata\TestUser\documents manually before printing.
The Printer driver will not create the directory automatically.
Please only use the <<USERNAME>> variable, other variables such as <<USERPROFILE>> are not supported.
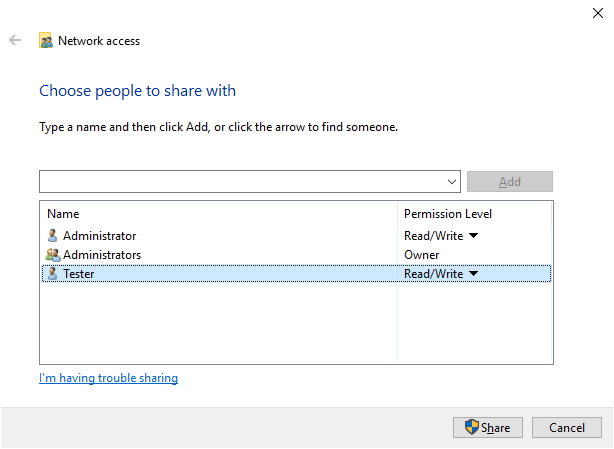
Please make sure that sufficient privileges are provided on the shared folder for the Client computer. To change permissions on a shared folder, right click on the folder and select “Share…”
Grant permission for the UNC path for the Client computer: grant read and write permission to the printing user(s).
Print from the client. The output document will be generated into the shared directory.
If experiencing any problem with the configuration, please make sure that the Client can access the configured shared directory through the Windows Explorer, by typing the UNC path to the address bar, for example: \\server\output
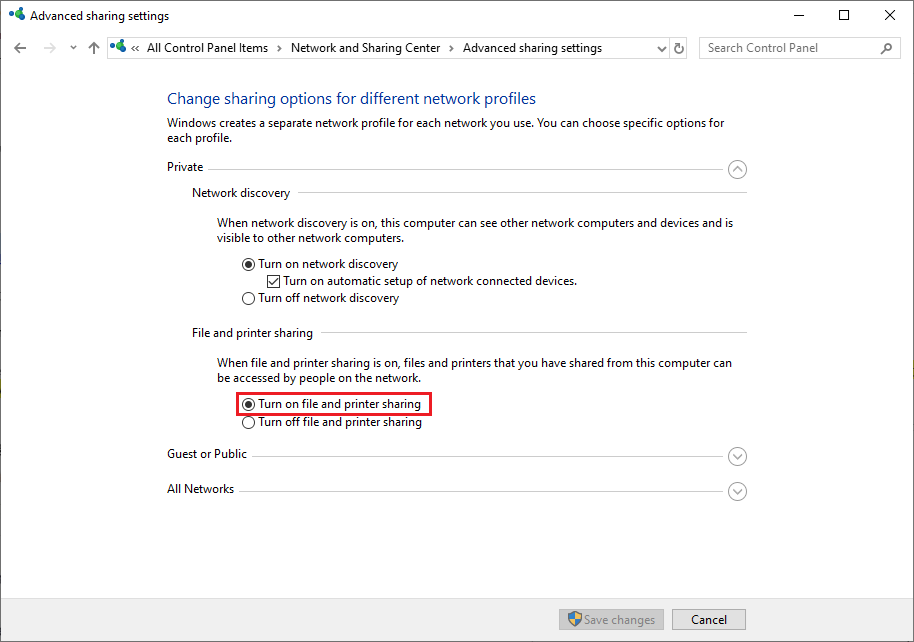
If the directory cannot be accessed, it means that the sufficient rights are not provided, or the sharing is restricted on one of the computers. Please make sure that the Turn on file and printer sharing option is selected in the Windows Control Panel > All Control Panel Items > Network and Sharing Center > Change advanced sharing settings.