Print2RDP includes an Audit Log feature which could be used to log every printed document, measure printer usage and calculate printing costs.
The Print2RDP log file can be enabled by the system administrator.
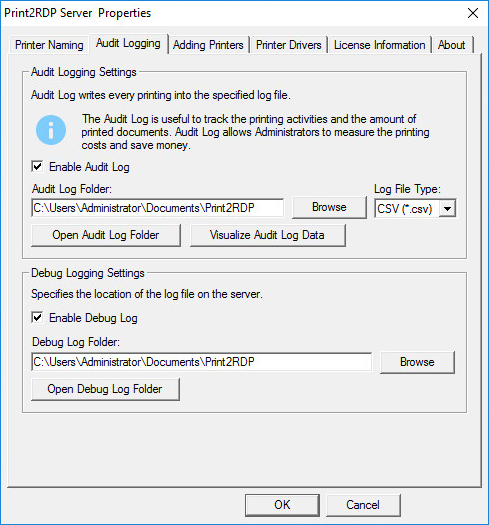
To enable Audit Logging, go to the Audit Logging tab, check the Enable Audit Log File option, browse or enter a directory where the Audit log files will be stored, and select the preferred Log File Type.
To open the directory where the log file is stored, click the Open Audit Log Folder button. A new Audit Log file is created every day, and includes the following information:
· Date of the printing
· Time of the printing
· IP address of the client
· Client User name
· Document name printed
· Number of pages
· Printer name
· Status: Success/Abort
NOTE: In case the user logs off from the remote session while printing, the Status will be Success, although the document will not be printed completely.
An example of how the Audit Log file will look like:
01/25/2018 20:01:16,"192.168.0.21","BLACKICE\John","MyDocument ","1","Black Ice PDF","Success"
01/25/2018 20:01:16,"192.168.0.21","BLACKICE\John","MyDocument1 ","1","Black Ice PDF","Success"
01/25/2018 20:01:16,"192.168.0.21","BLACKICE\John","MyDocument2 ","1","Black Ice PDF","Success"
01/25/2018 20:01:16,"192.168.0.21","BLACKICE\John","MyDocument3 ","1","Black Ice PDF","Abort"
One can easily import the log files into Excel or other application to make further calculations or to review the data.
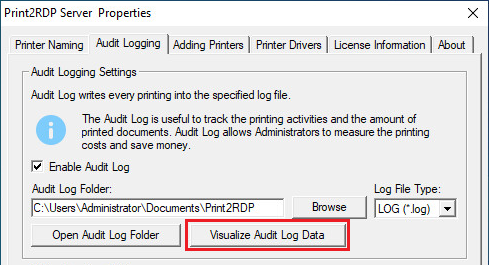
Also, one can review the data in Print2RDP by clicking on the Visualize Audit Log Data button.
Visualize Audit Log Data
One can display the Audit Log by clicking on the Visualize Audit Log Data button.
The following window appears:

In the Filter Audit Log area, one can filter the logs for the followings:
· Date interval of the printing
· Status of the printing (Success or Abort)
· Category (Printed Documents or Printed Pages)
· Used Printer name
Under the Filter Audit Log Area, the filtered audit log data will be displayed on two separate charts displaying the printed documents/pages by Username, and by IP Address.
By clicking on the Print Charts button, one can print the two charts and the data to a selected printer.