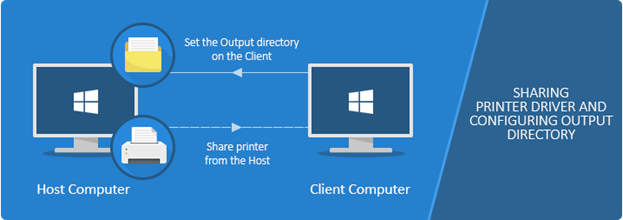
To properly configure the Output Directory of the shared printer on the Client, please perform the following steps:
1. On the Host computer (where the Printer Driver is installed) go to Control Panel > Printers and Devices > right click on the Print2Email Printer Driver > Printer Properties > Advanced > Printing Defaults.
Please click on the Advanced Tab and select the “Printing Defaults …” option as shown on Figure 1 below.
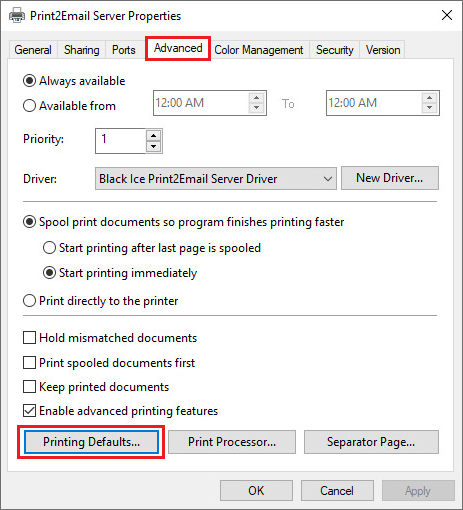
(Figure 1)
2. On the Host computer, go to Filename Generation tab, and check the ‘Set output directory on the client computer for shared printers’ option as shown on Figure 2.
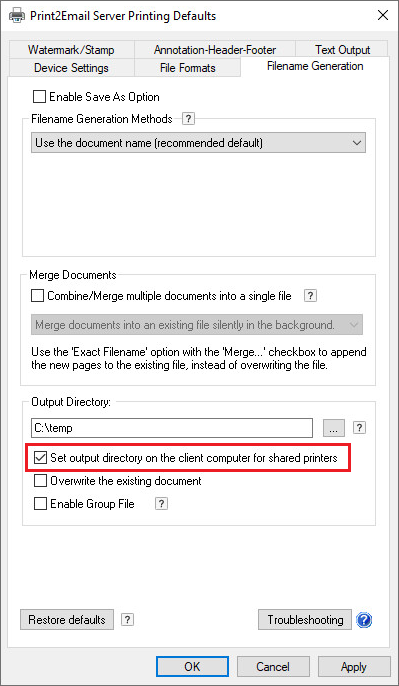
(Figure 2)
3. If the printer is already shared and added to the Client, the Output directory can be configured only on the Client as shown on Figure 3 below. To read more about how to share a printer, please refer to the Printer Sharing section of the manual.
NOTE: The output folder must exist on the Host computer.
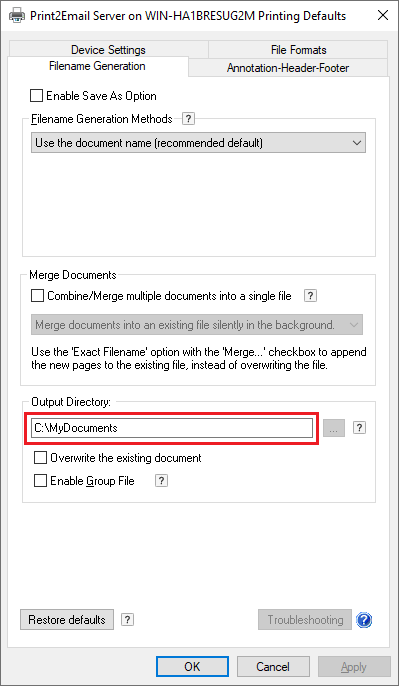
(Figure 3)
4. When printing from the Client, the output document will be generated into the specified output directory on the Host (server) computer (for example: C:\MyDocuments, as shown on Figure 3).