
The BiBatchConverter have a built-in feature to upload converted files to an FTP server instantly. This feature is available from version 4.08.
NOTE: The FTP upload feature requires .NET Framework 4.0 or higher version!
Upload to FTP feature can be enabled in the Converter Settings on BiBatchConverter, or in Control Panel > Printers and Devices > right click on the BiBatchConverter > Printing Preferences… > Filename Generation Tab > check Upload to FTP and click on Edit Upload to FTP Settings button.
The list of the available FTP connections appears, where one can select an already existing FTP configuration to upload documents, or add new FTP connections based on the instructions below.
New connection
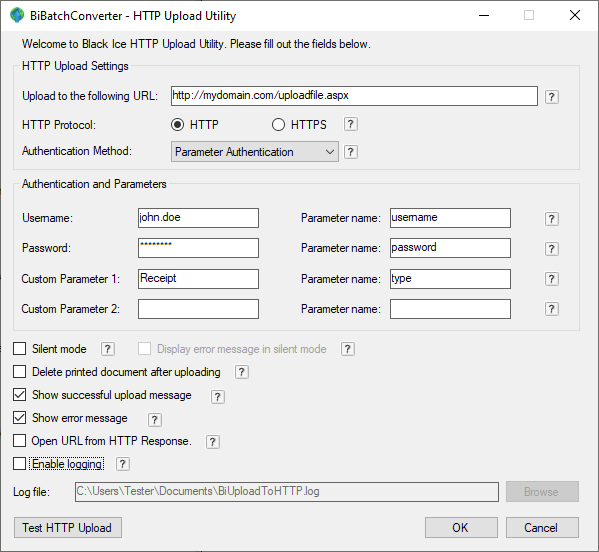
To add a new FTP connection, click on the New connection button. The following window appears where one can configure the FTP connection.
Connection Settings
The Connection Settings tab contains the general settings of the FTP connection, including the followings:
Connection Name: The name of the new FTP connection. This name will be displayed in the Connection List.
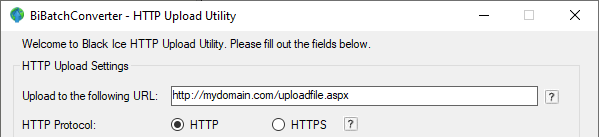
URL of the FTP Server or IP Address: The URL or IP Address of the FTP Server. For example: 216.55.55.55 or ftp.yourdomain.com
Security mode: Select the security mode of the FTP Server from the following options:
· Unsecure
· FTP with explicit SSL/TLS encryption (FTPES)
· FTP with implicit SSL/TLS encryption (FTPS)
· SFTP
If not sure which security mode should be used, please contact the System Administrator.
TCP/IP Port: The port of the FTP Server. Usually it’s 21.
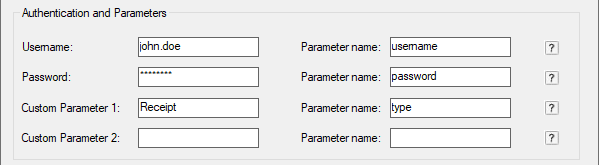
Login Name: A valid username on the FTP Server.
Password: The password for the entered Login Name on the FTP Server.
Destination Directory on the Server: In this field users can configure the destination folder on the FTP Server of the uploaded files.
For example, with the default settings (/) the files will be uploaded to the root directory of the FTP Server. If entered /printed_documents then the Printer Driver uploads the printed documents into the printed_documents folder on the FTP Server. Please be aware that the configured directory must exists!
Passive Mode: Use Passive Mode.
Accept Untrusted Certificate: For secure connections accept untrusted certificates.
Proxy Settings
The Proxy Settings tab contains the optional proxy server configuration for the FTP connection.

Proxy Type: Select the type of the proxy server. To not use Proxy settings, select None. The available Proxy Types are the followings:
· Socks4
· Socks4A
· Socks5
· HttpConnect
URL of the Proxy Server or IP Address: The URL or IP Address of the Proxy Server. For example: 216.55.55.55 or ftp.yourdomain.com
TCP/IP Port: The port of the Proxy Server.
Login Name: A valid username on the Proxy Server.
Password: The password for the entered Login Name on the Proxy Server.
Domain: Configure the domain of the proxy server. This option is necessary if the Proxy Type is HtmlConnect and the Method is Ntlm.
Upload Settings
The Upload Settings tab contains configurations related to the documents to be uploaded and documents already existing on the FTP Server.
Upload Settings:
· Upload printed document: Enables uploading the generated document to the FTP Server. When this option is enabled, the Upload to FTP feature will upload the generated document to the FTP Server.
· Upload OCR file: Enables uploading OCR (Optical Character Recognition) text to the FTP Server. When this option is enabled, the Printer Driver generates the OCR text during printing, and the Upload to FTP feature will upload the text to the FTP Server.
· Upload Text file: Enables uploading text output to the FTP Server. When this option is enabled, the Printer Driver generates the text output during printing, and the Upload to FTP feature will upload the extracted text to the FTP Server.
· The Delete files after uploading option will delete the generated output document from the local computer.
Action on Existing files:
· Overwrite All option overwrites already existing files on the FTP Server.
· Overwrite Different Size option overwrites the already existing files on the FTP Server, if the file size is different than the new file.
· Rename option will append a number to the existing file name. For example: filename1.PDF
· Skip All option skip uploading the file if it’s already existing on the FTP Server.
Advanced
The Advanced tab contains advanced configurations such as deleting files after uploading, overwriting files or Logging.
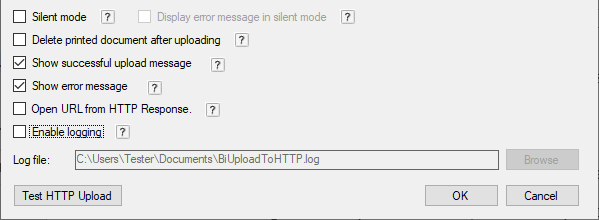
The Logging option created a detailed log file with the connection settings, uploaded documents and occurring issues to the path and filename specified in the Log file name.
Display “Document uploaded successfully” message option driver will show a message box after each successful upload. The message box is only shown if the print job is not printed from a service.
Display FTP upload error message option will show a message box with the error message if the FTP upload was unsuccessful. The message box is only shown if the print job is not printed from a service.
When finished configuring the FTP Connection, click on the Test FTP connection button to check if the configured connection works properly, and click on the Save button.

The new connection appears in the Connection List. Select the connection by clicking on it, and click on OK button to use this connection for uploading documents to FTP. Every time when printing a document to the Black Ice Printer Driver, it will upload the output document to the selected FTP connection automatically.
Click on the Edit.. button to change the settings of the selected FTP connection.
Click on the Delete button to remove the selected FTP connection.
Common FTP connection problems
The following table includes the most common problems when configuring Upload to FTP feature and the recommended solution:
|
Error message from the Upload to FTP feature: |
Source of the problem: |
Solution: |
|
A socket operation was attempted to an unreachable network. |
No internet connection on the computer or the Network card is disabled. |
Please make sure you have active internet connection on the computer, and the network card is enabled. Also, please make sure that the FTP connection is allowed through the firewall. |
|
A connection attempt failed because the connected party did not properly respond after a period of time, or established connection failed because connected host has failed to respond. |
Wrong FTP Server address or FTP Server port configuration. |
Please make sure the FTP server and the port number is configured properly. |
|
Error code: 530 :Not logged in. Username/password incorrect, user disabled, or user logged in too many times (530). |
Wrong FTP Server user name or password configuration. |
Please make sure the FTP username and password is configured properly. |