Launch the downloaded file to begin installation.
Click Next to begin the installation.
Read the End User License Agreement. Then select the radio button for ‘I accept the license terms and conditions’ and click Next.

Select the installation directory of the printer driver and click Next.

InstallShield Wizard installs the PDF Printer Driver.

Set the output folder and several post-printing options.
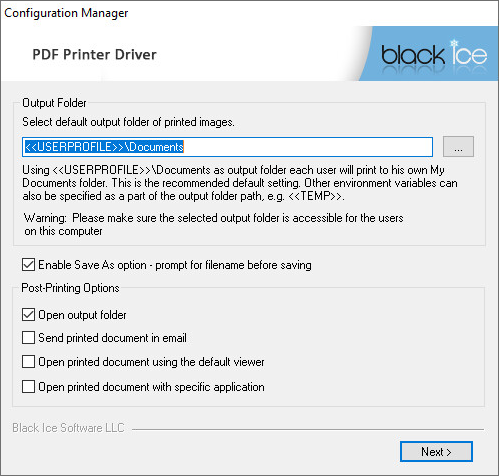
If an administrator wants to configure the default output folder for each user, the administrator can do it at this point. Whatever value is specified here, that is the default output directory for all users. Make sure that the printer driver users have the appropriate permissions to create the files in the directory.
Environment variables can be used in the output path. For example, if specifying <<USERPROFILE>>\Documents, each user prints to one’s own documents folder.
NOTE: If an administrator creates a new user variable on Windows 8/7 or 2012/2008 that only applies to the administrator, the other users are not able to use that user variable automatically. Make sure that the user variable exists for all users.
If the specified environment variable is not found, by default, the printer driver uses the temp directory of the actual user to generate the output files.
Some applications are able to use the custom environment variables only if the system rebooted after creating the environment variable.
If the Enable Save As option - prompt for filename before saving option is selected, the Save As… dialog is displayed before printing.
Select the necessary settings, and click Next.
Select the number of printers or threads to install/activate for the PDF Printer Driver.
As of version 14.27, the Black Ice Printer Drivers are capable of installing multiple printers on the same computer, creating a high-volume document converter solution.
As of version 15.41, the Black Ice Printer Drivers are capable of installing multiple ports, creating a high-volume document converter solution.
NOTE: Only one of the following options can be selected.
Select the number of printers
Multiple printers can print documents simultaneously, which results much faster and more reliable document converter solution. For more information, please refer to the Multi-printer installationsection.

Select the number of threads
Single Printer Parallel Thread configuration offers the similar performance in document conversion as the Parallel Multi-printers, although it only has one Printer. For more information, please refer to the Activating Multiple Threads section.

The Black Ice Printer Manager automatically begins installing. No user intervention is required during the installation of the Printer Manager.

On the next screen three installation options will be displayed:
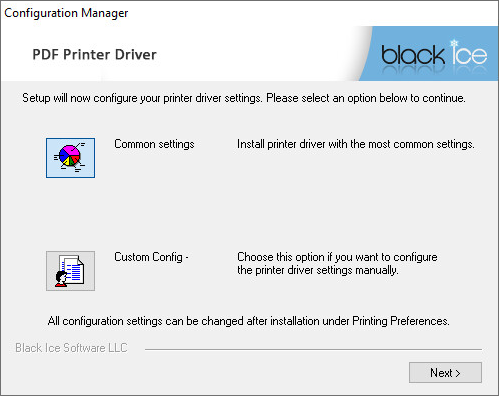
Document Conversion: Selecting this setting will automatically configure the driver for document imaging output. One can change these settings at any time after installation. By default the file format will be set to the following file formats:
|
ColorPlus Printer driver |
|
|
Color Printer driver |
JPEG |
|
PDF Printer Driver |
|
|
Monochrome Printer Driver |
TIFF |
Custom Config: Selecting this setting will bring up the Driver Properties dialog box where the user can manually configure the driver. One can change these settings at any time after installation.
Check the tabs to be displayed in the Printing Preferences according to one’s needs.
PDF Printer Driver can be configured just as any other printer through the Printing Preferences. However, not all the options are necessary for the user, for example, Bates numbering and Annotation. The next installation window, the Configuration Manager provides an option to disable any tabs except the Device Setting tab, which is required. These settings can be changed after installation.
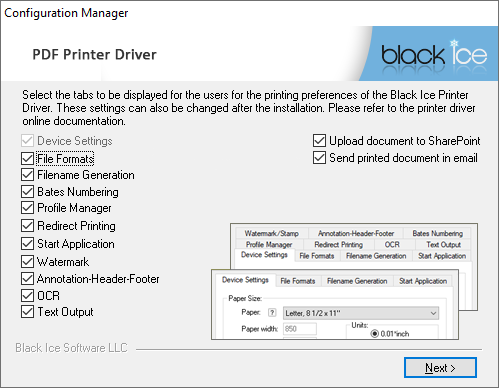
Select the necessary settings, and click Next. To disable or enable any of the tabs after installation, please refer to the Disabling or enabling Tabs in Printer Driver printing preferences section.
At the next step of the installation, one can create Agent Printers for frequently used routine tasks. These Agent Printers will appear in the Printers and Devices as any other printer and can be configured separately from the original Printer Driver.
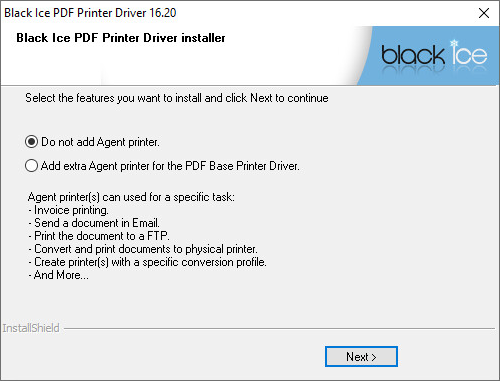
To Add an Agent Printer, select the Add extra Agent printer… option and click on the Next button. Otherwise, click on the Do not add Agent printer option and skip the Add Agent Printer related steps in this installation guide.

If the Add extra Agent printer option is selected, the following window appears. One can specify the Agent Printer Name which will be the printer’s name in Devices and Printers, specify the description and select a predefined profile for the printer to use.
If none of the predefined profiles fits the requirements, one can select Custom Profile option and Browse for a customized profile file.

One can also select the Custom Configuration option, and configure the Agent Printer printing preferences after clicking on the Next button.

If Custom Configuration isselected and the Next button is clicked, the agent printer printing preferences will open. When the configuration is finished, click on the OK button to save the settings and click on the Next button to create the Agent Printer.

After the Agent Printer is configured, a window appears notifying the user that the Agent Printer was created successfully. Optionally, one can add more Agent Printers by clicking on the Yes button on the window. By clicking on the No button, the installation continues.

Set up the Black Ice Printer Driver as Default Printer for the current user or all users on the computer, or Keep the current Default Printer.
The computer will always send documents to the default printer unless the user specifies otherwise. Also, the documents printed by right clicking on the file and select the Print option will send the document to the default printer automatically.

Select whether to launch and place a desktop shortcut of the Black Ice Printer Manager, and choose whether to install the Black Ice Tiff Viewer application for viewing images.
