It can be necessary for the user to insert a watermark or background image in the printed documents to add a company logo or to identify the document status.
Black Ice Printer Driver can be configured to add a custom stamp to a printed document.
To configure Black Ice Printer Drivers to use watermarks, perform the following steps:
1. Open the Black Ice Printer Driver’s preferences.
2. Click on the Watermark/Stamp tab and check the Enable Image Watermark checkbox.
Watermark Options
Add watermark or stamp to the first page only - When this checkbox is checked, the watermark is printed only on the first page of the document.
Unique watermark or stamp on the first page - The watermark on the first printed page can be different from the watermarks on the other printed pages.
Watermark image file - Specifies the image file that is used as a watermark. The supported image formats are TIFF, BMP, JPG and PNG.
If needed, the printer driver converts the text watermark to the format of the page that is currently printed. For example, if a colored text watermark is specified as a watermark and the printer driver is set to generate monochrome (Black & White) documents, the watermark is dithered to monochrome and the monochrome text is added to the page as a watermark.

NOTE: Make sure images are located in a directory where all printer driver users have read access privileges or higher.
NOTE: Environment variables cannot be used to specify the image file.
Black Ice Printer Driver’s watermark library can be used to insert installed Black Ice watermarks and stationeries.
The watermarks and the stationeries are located in the installed Black Ice Printer Driver folder. This is the default directory when the user clicks on the Browse button.
<Path of the Installed Black Ice Printer Driver>\Watermark
Users can use 50 different watermarks and 10 different stationeries for their document background.

Watermarks can be stretched to fit the page, and separate watermark image files can also be set as portrait and landscape-oriented pages. This way one can specify a portrait-oriented watermark for portrait-oriented pages, and a landscape-oriented watermark image for landscape-oriented pages.
Visibility - The visibility value determines how visible the watermark is on the page. A lower percentage value produces a lighter watermark; and higher value produces a more visible watermark.
If the watermark does not contain an alpha channel, the Printer Driver uses multiply blending to insert the watermark on the converted document. The darker the color in the watermark the more visible it is on the converted document. This allows the usage of images with white background without interference with the document. The lighter colors will be less visible.
When the watermark used contains an alpha channel, the Printer Driver inserts the image as is. The configured alpha channel will also be inserted into the document.
Position - Sets the mode for how watermarks are printed on the page. The available options are:
Stretch to fit: Stretches the watermark image to the size of the image page. Depending on the size of the watermark, stretching can distort the watermark image.
Stretch to width: Stretches the watermark image to fit the width of the page. Stretching does not distort the watermark image but the length of the image can become longer than the page itself and parts of the watermark may not be visible on the page.
Center image: Prints the watermark in the center of the page. No stretching is done.
Tile: Prints a watermark tiled on the page. The original size of the watermark image is not changed and the watermarks are cropped if they do not fit on the page entirely.
Top: Prints a watermark on the top-center of the page. The original size of the watermark image is not changed and the watermarks are cropped if they do not fit on the page entirely.
Top Left: Prints a watermark aligned to the top-left corner of the page. The original size of the watermark image will not be changed, and watermarks will be cropped if they do not fit completely on the page.
Top Right: Prints a watermark aligned to the top-right corner of the page. The original size of the watermark image will not be changed, and watermarks will be cropped if they do not fit completely on the page.
Fit to Width – Top: Prints a watermark on the top of the page and stretches the watermark image to fit the width of the page. Depending on the size of the watermark, stretching can distort the watermark image and the watermarks are cropped if they do not fit on the page entirely.
Bottom: Prints a watermark on the bottom of the page. The original size of the watermark image is not changed and the watermarks are cropped if they do not fit on the page entirely.
Bottom Left: Prints a watermark aligned to the bottom-left corner of the page. The original size of the watermark image will not be changed, and watermarks will be cropped if they do not fit completely on the page.
Bottom Right: Prints a watermark aligned to the bottom-right corner of the page. The original size of the watermark image will not be changed, and watermarks will be cropped if they do not fit completely on the page.
Fit to Width – Bottom: Prints a watermark on the bottom of the page and stretches the watermark image to fit the width of the page. Depending on the size of the watermark, stretching can distort the watermark image and the watermarks are cropped if they do not fit on the page entirely.
NOTE: Images and documents have their own DPI settings. For the best results, make sure the watermark image has the same DPI as the desired output.
If, for example, a 72 DPI watermark image is placed on a 300 DPI output, the watermark image may appear smaller than the desired size.
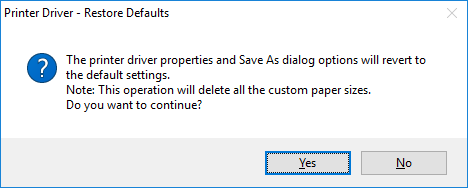
Restore defaults - The Restore defaults button will restore the default printer settings from the printer configuration INI file for the current User only. The Save As dialog options revert to the same default settings as well. This operation deletes all the custom paper sizes. Once pressed, the following warning message is displayed: