The following section describes how to print from Web Service using the Auto-print SDK and how to configure IIS version 7 for printing. The C# sample code demonstrates how to print a single document located in a directory.
Requirements:
The ASP.NET Web Service must use .NET 4.0 or newer as target framework.
Supported and Tested environments:
Internet Information Services 10 (Windows Server 2022/2019/2016), Services 8 (Windows Server 2012 R2)
Limitations:
Auto-print SDK only works with Black Ice printer driver and does not work with physical printers.
For using Auto-print components in a web service, the service must run under an Administrator account or user account with administrative privileges, and the web service Bin folder must be added to the system Path. To configure the Auto-print components in a web service, perform the following steps:
If you already have a webpage/web service for converting documents, you can skip step 1-5.
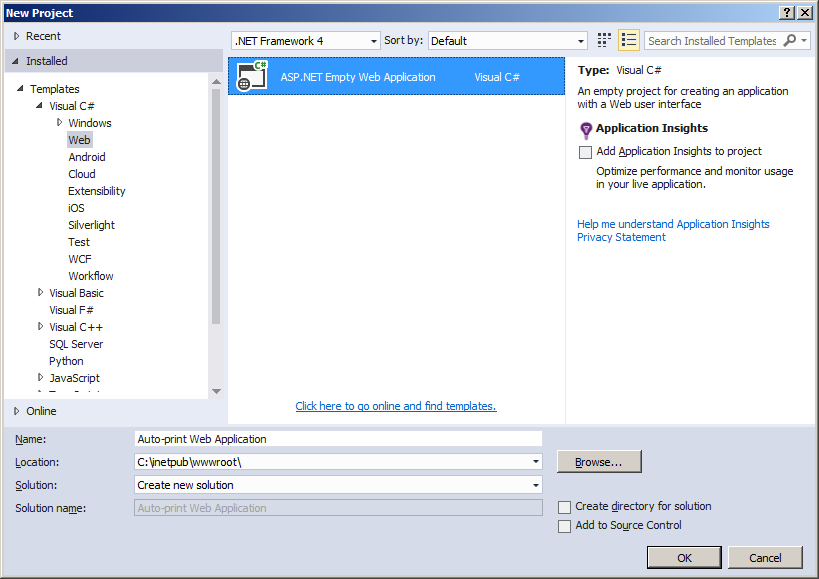
1. Create a new ASP.NET Empty Web Application in Visual Studio.
For location set the Internet Information Service (IIS) wwwroot folder.
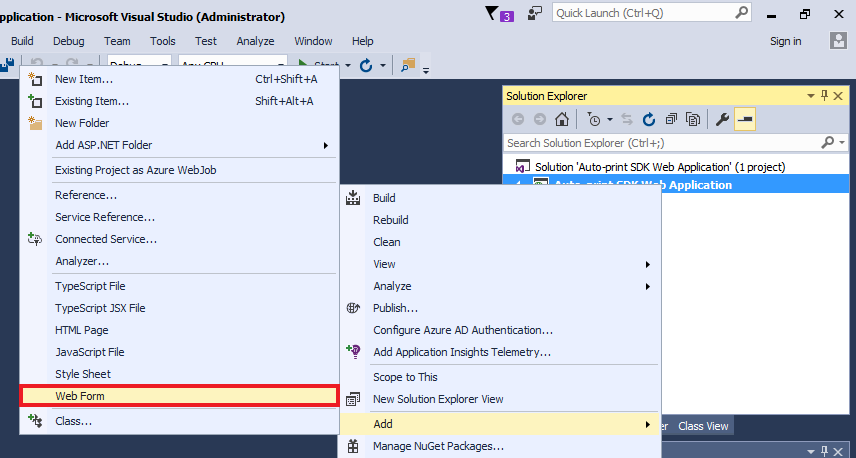
2. In the newly created ASP.NET Empty Web Application, add a new Web Form by right-clicking on the project in the Solution Explorer > Add > Web Form.
This web form will going to convert documents with Auto-print SDK.
3. In the current simple example, the new Web Form will be named to Printing.
4. Adding the Web Form creates a Printing.aspx and Printing.aspx.cs file in the project.
The Printing.aspx has the following source code:
Explanation: The code contains a label, which will be updated once the Auto-print has finished converting the document.
|
<%@ Page Language="C#" AutoEventWireup="true" CodeBehind="Printing.aspx.cs" Inherits="Auto_print_SDK_Web_Application.Printing" %>
<!DOCTYPE html>
<html xmlns="http://www.w3.org/1999/xhtml"> <head runat="server"> <title></title> </head> <body> <!--This label will be updated once the conversion is complete --> <asp:Label ID="lblResult" runat="server" Text="Label"></asp:Label> </body> </html> |
5. The Printing.aspx.cs has the following source code:
Explanation: The code contains a ConvertFileToPDF() method, which is called immediately, once the page is loaded, to convert a document. This method receives the absolute path of an input document as a string parameter, and updates the label in the Printing.aspx, once the conversion is finished.
|
using System; using System.Collections.Generic; using System.Linq; using System.Web; using System.Web.UI; using System.Web.UI.WebControls; using BLACKICEDEVMODELib; using BIAUTOPRINTLib;
namespace Auto_print_SDK_Web_Application { public partial class Printing : System.Web.UI.Page { protected void Page_Load(object sender, EventArgs e) { //Calling the printing function when the page loads. ConvertFileToPDF(@"c:\input\Document.pdf"); }
//Conversion private bool ConvertFileToPDF(string inputfile) { try { lblResult.Text = string.Empty; string strMessage; string err = string.Empty; //Using the Black Ice ColorPlus Server printer. string strPrinterName = "Black Ice ColorPlus Server"; bool bSuccess; string strSourceFile = string.Empty;
//BiAutoPrint initialization. BiAutoPrint autoprint = new BiAutoPrint(); autoprint.BIAPInitialize();
//Source file absolute path. strSourceFile = inputfile;
//Starting printing. if (autoprint.BIAPStartPrinting(strPrinterName, strSourceFile)) { bSuccess = true; strMessage = "Printing was successful"; } else { bSuccess = false; err = autoprint.BIAPGetErrorString(autoprint.BIAPLastError); strMessage = "Error printing: " + strSourceFile + " - " + err; }
//Ending printing. if (autoprint.BIAPEndPrinting() == false) { bSuccess = false; err = autoprint.BIAPGetErrorString(autoprint.BIAPLastError); strMessage = "Error end printing: " + strSourceFile + " - " + err; }
//Auto-print EndPrinting and UnInitialization. autoprint.BIAPEndPrinting(); autoprint.BIAPUnInitialize();
//Updating the webpage content upon success. lblResult.Text = "Success!"; return bSuccess;
} catch (Exception ex) { string strError = ex.Message; lblResult.Text = "Error: " + strError; return false; } } } } |
6. Copy the following components from Auto-print redistributable files (see in Auto-print Redistribution Files) into the Bin folder of the web service:
- Auto-print API components
- Printer Driver API components
- Image printing components
- Registration components
The Web Service Bin folder in the sample is the following:
“c:\inetpub\wwwroot\Auto-print Web Application\bin”
7. Activate Auto-print license (see in Activating a Runtime license) if Auto-print SDK is not installed on the machine where the web service is hosted.
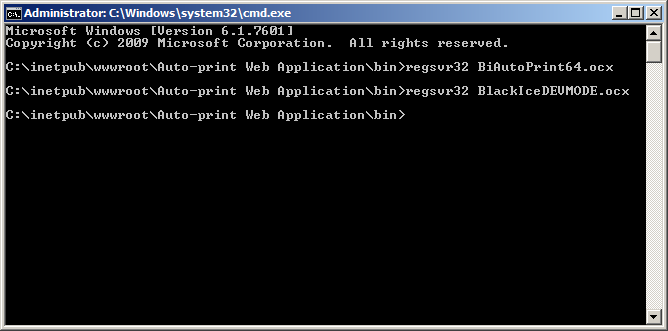
8. Register the .OCX files manually (see in Registering OCX controls manually section of Registering the ActiveX Controls ) in the Bin folder of the web service
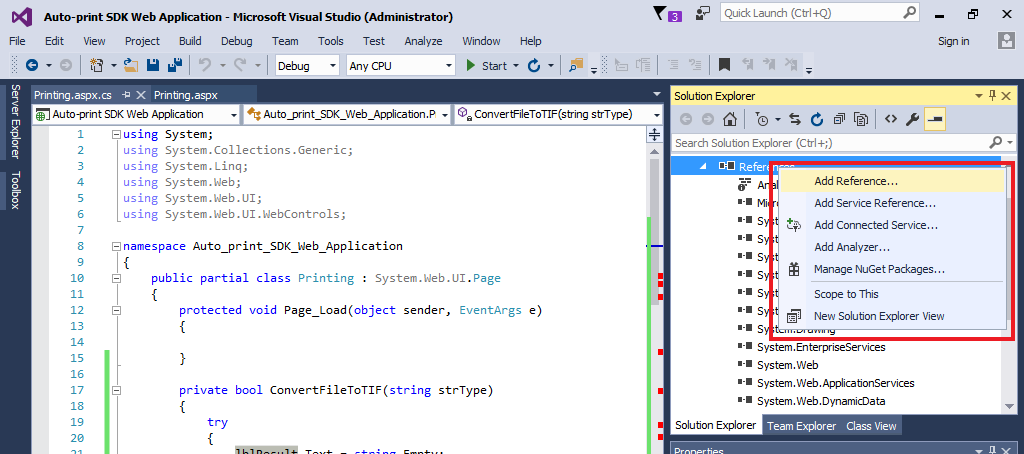
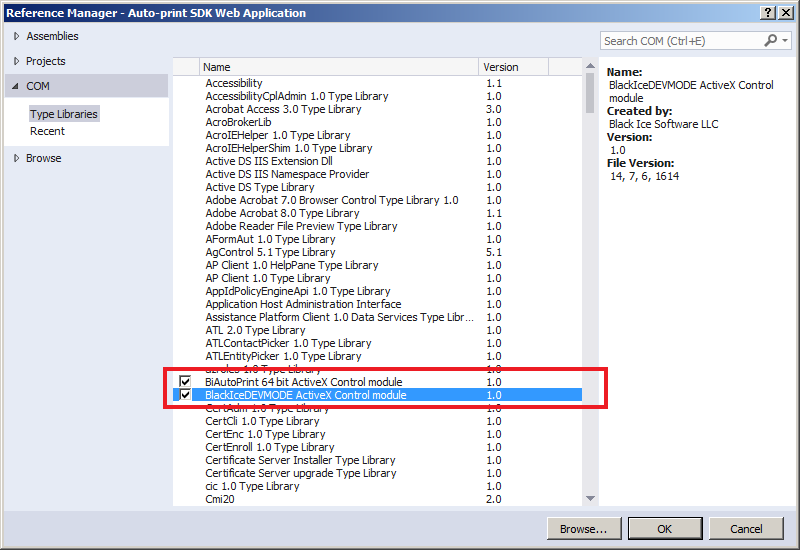
9. Add the BiAutoPrint and BlackIceDEVMODE OCX files to the project as Reference. To do this, right-click on the project in the Solution Explorer > Add Reference.
10. Go to the COM libraries > check the BiAutoPrint and BlackIceDEVMODE, and click on OK to continue.
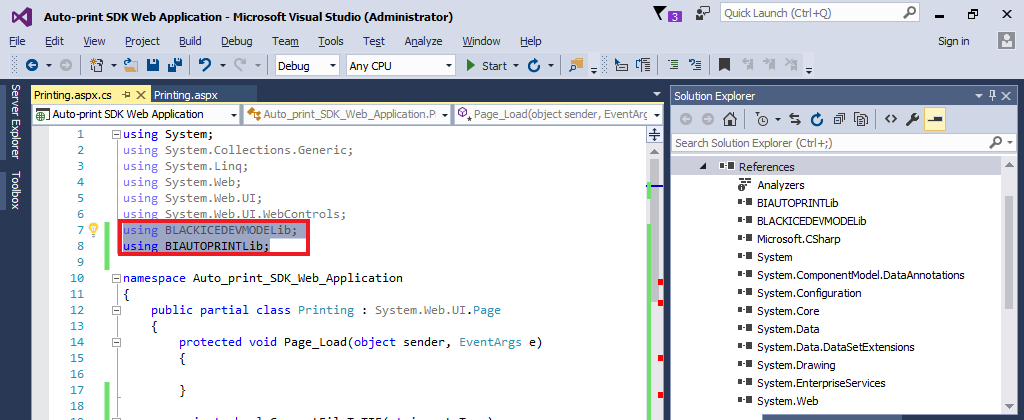
11. Add the references to your webpage as on the following screen capture.
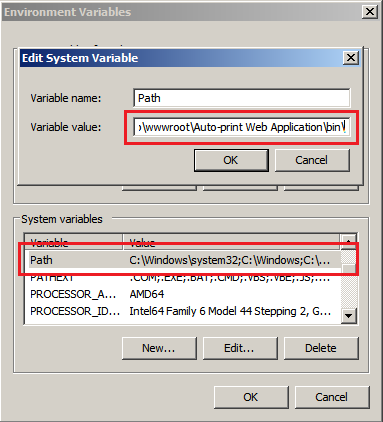
12. Add the Bin directory of the WCF service to the PATH:
a. -Open Control panel > System and Security > System
b. -Click on Advance system settings
c. -On the Advance tab click on Environment variables
d. -In the system variables list select the Path variable and click on edit
e. -Add the full path of the WCF service Bin folder to the Variable value (separate by ; )
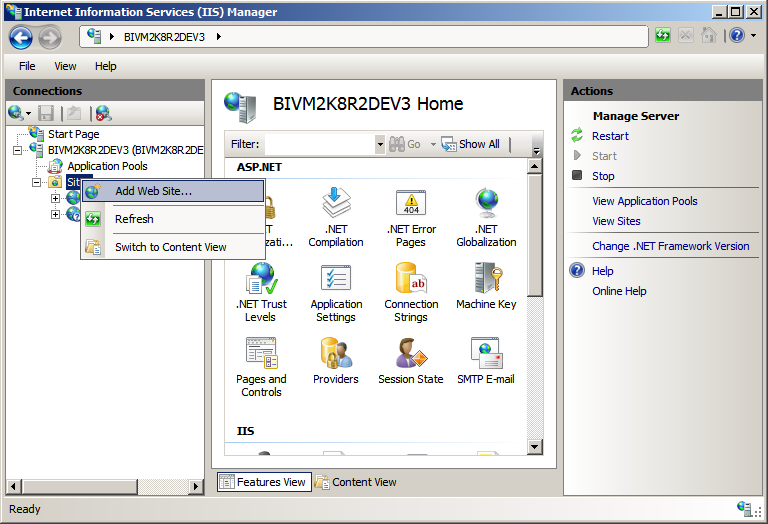
13. Open Internet Information Service (IIS) Manager from Start menu.
14. If the website/web service is not already created, in the Internet Information Service (IIS) Manager right-click on Sites > Add Web Site…
15. Configure the project directory as Physical path, and click on the OK button to create the website/web service.
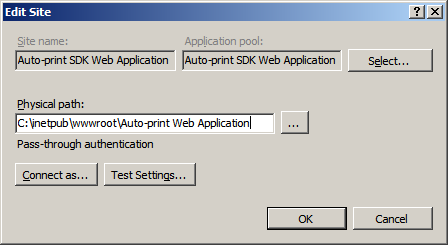
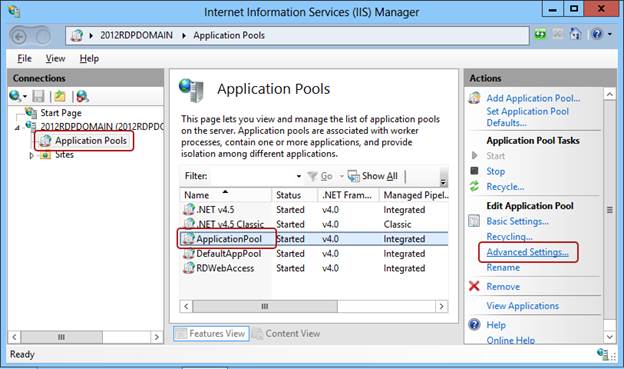
16. Click on the Application pools in the left side of the IIS Manager.
17. Select the Application pool which is used for the service
18. Select Advanced Settings… options on the right side.
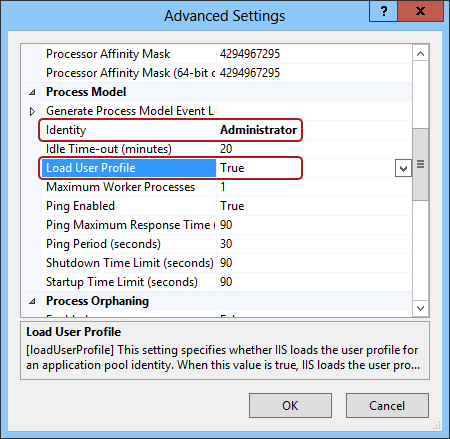
19. Locate the Identity, and make sure it’s configured to the Administrator, or an account with administrative privileges.
20. Locate the Load User Profile and change it to True.
21. Save the settings and restart the Application Pool to apply the changes.
22. You can run the code by accessing the Printing.aspx webpage in any web browser. For example \\localhost\Printing.aspx or www.mywebsite.com/Printing.aspx
NOTE: If you experiencing Timeout errors while accessing the page, please make sure that Adobe Reader is installed on the computer, and that the Adobe Reader has been started manually at least once.